Note: I haven't used Bryce in years; so these tutorials are archived "as is." I can't accept questions, because I don't remember the answers.
This is page 5. If you haven't finished page 4, please do so before starting this page.
 When you are happy with the stream so far, duplicate the Stream Bank again and open its Object Attributes. Give it a Neutral Boolean, name it Stream and take it back into the Terrain Editor. This time, we are going to make the waterfalls.
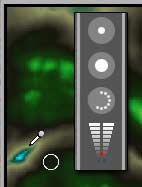
Set the Paint mode to Elevation, and get a fairly small brush with a medium flow and a hard edge. Move to the top of the falls, and hold down the space bar to get the dropper so you can sample the color of a pixel at the edge of the stream. Remember, you don't have to click to sample the color. Just run the cursor over the area, and watch the elevation marker.
 Use that color to paint the first step of the falls.
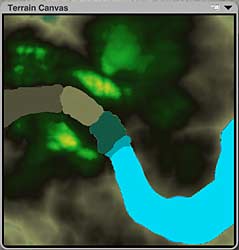 Paint a section, and then choose a color at this level of the bank to paint the next step. Continue in this fashion, making as many steps as you desire. (The more steps you make, the shallower the falls will be. The fewer, the steeper each fall is.) Alternate using Elevation, Minimum and Maximum paint modes to get your falls just the shape you want them.
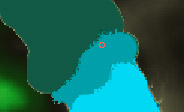 When you are happy with the basic shape, change the paint mode to Erosion, get the smallest brush possible, and erode the very edge of each step, so it will have a more natural profile when it's going to the next level down, instead of looking like it was cut with a knife.
Retouch the edge, if the area was eroded down into the water level, by alternating the Minimum and Maximum paint modes again. Don't forget, while doing this, that although you cannot zoom into the Terrain Canvas, you can make the whole thing larger. I highly recommend using the maximum Canvas Size for this step, even if you don't usually use it. (Go to the flippy triangle at the top right of the Terrain Canvas to Set Preview Size, and choose 768x768.)
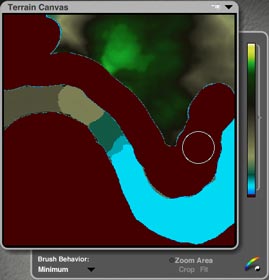 Finally, use the Elevation brush to lower everything that isn't stream down as far as it will go, and clip it with the Clipping Plane.
 Leave the Terrain Editor, and color this one blue so you can see what you have quickly and easily. Take any terrain that needs more retouching back into the Terrain Editor and fix it. Feel free to tweak it until you have just what you want.
 When it all looks just the way you want it to, enlarge the group so it's big enough to make a decent landscape. (If you leave it this size, you are likely to run into problems when you start to add the materials. A lot of it you will be able to fix by changing the frequency, but the wet rocks will have a texture that is too large when you get the altitude for the wet part low enough. Remember, landscapes in Bryce are supposed to be BIG.) Remove the ground plane if it interferes with the stream. We don't need it for this shot, so why have it?
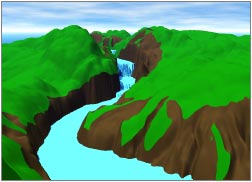
Maneuver until you have a camera angle that you like.
 Shall we use the DTE to make one more texture for the waterfall? Let's! This one will be easy.
Take the Stream terrain into the Materials Editor, and give it the Raindrops on Water material that we made earlier.
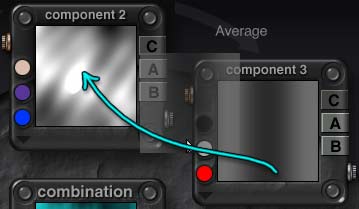
We only have room for three components, and we want to keep ripples on the top of the water, the drops on the top, and add a frothy texture for the falls. We are going to have to sacrifice one of the three textures already here. I've decided to get rid of Component 2, because it is really being used to modify the ripples from Component 1. I could just use Phase to do that, instead; but I don't think I will. I'll just go with the single ripple noise, since there won't be large open areas of water where you would be able to see any repetitious pattern emerging, anyway.
So, move Component 3 (the drops) into Component 2 slot by just dragging it over there. Change the blending mode to Average, so it matches the one we had.
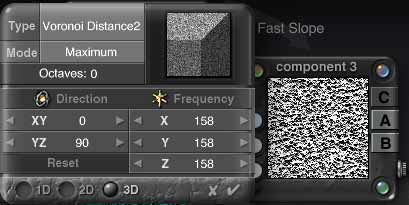
Open the Noise dialog for Component 3, (click on its glassies, or use the button at the bottom, but make sure the blue ball is in the third hollow.) We need the noise to look like froth. Checking our handy-dandy Appendix 1, I'm going with Voronoi Distance2 for this one. Choose your noise from the Type menu.
We also need to remove the filter, so open that, make sure you are working on Component 3 (look for the blue ball, and the glowing glassies) and make it None.
Change the noise to 3D, so it will show no matter what angle the drop has, and increase the Frequency by dragging on the gold Frequency tool. I'm increasing it to around 160.
Finally, change the Blend Mode to Fast Slope. That will put the ripples and drops on horizontal surfaces, and the froth on anything that isn't horizontal. Which, of course, is just what we want.
 Hit the Enter key to leave the DTE, and save this texture as a preset. Leave the Materials Editor, and render the picture, to see how it looks.
To make the water more transparent, reduce the value of the Transparent and Volume colors. The closer to white they are, the more transparent the water will appear. (Also increase the Transparency, of course.)
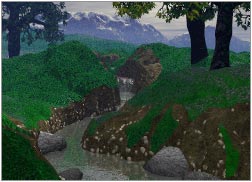
Now all that remains to be done is to add some background, put the rocks and trees into the picture, and render the finished piece! You may want to slip some rocks behind the water in the waterfall, if it's transparent.
If you do so, don't forget to make a material in the DTE that is for rocks that are wet all over! (Simply take the rock material that we made earlier into the DTE, change the filter on the third component to Clip aX+b, and move the graph up by dragging it upwards until the dark color covers the entire preview.)
You can use the same trick with the flipped terrains to make ponds, rivers, or whatever body of water you feel inclined to make. I'm sure that you can think of even more applications.