Note: I haven't used Bryce in years; so these tutorials are archived "as is." I can't accept questions, because I don't remember the answers.
This is page 2. If you haven't finished page 1, please do so before starting this page.
 We need to make a few more pieces, and, as we have before, we are going to make them in new documents. That keeps the file size down while you are constructing things, remember, and also helps to crash-proof you. So save this, and open a new scene.
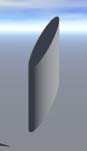
In the new document, create a cylinder, and rotate it at a 45° angle on the X axis. (Hold down Command/Ctrl and grab the control handle on the side to rotate. Hold down the Shift key to constrain the rotation to 45° increments.)
Now, make sure that Resize by World Space is enabled, and pull it up on the Y axis. It will skew as you pull it. Whenever you resize something that is at an angle, in any mode other than Object Space, you will skew it. Sometimes you don't want that, in which case you just undo, change modes, and try again. But sometimes you do. Skewed terrains can give you overhangs and shattered landscapes. Skewed trees can give you interesting bonsai effects. Skewed primitives can give you things like this. Let your imagination run wild!
 Go to the Rotate tool on the Edit palette, and Unrotate (under the triangle) to return your cylinder to vertical. Shrink it down using the Edit tool, so it will retain its symmetry, name it Pylon, and center it. We need to replicate this, too, to make a ring of six pylons. In this case, the diameter of the ring is going to be the width of one of these cylinders. We can't just eyeball that from the ground plane grid, so we are going to use the Attributes dialog to enter the exact placement for the Origin point.
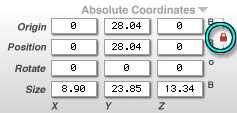 Open the Attributes, and look at the Origins row. Right now, it's locked to the Position. But all we have to do to unlock it is click the little padlock. Do that now. Simple, huh? It's there to prevent accidents, not to make it hard to change.
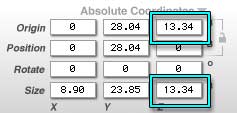 We need to move that point exactly the distance of the width of the pylon. So, just copy the number in the Z axis column of the Size row into the Z axis text field for Origin, relock it, and close the box.
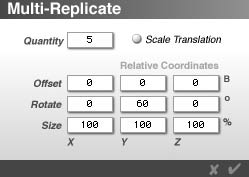 Replicate, making six Pylons that form a ring. You know how to do it. Just the same way we did for the columns.
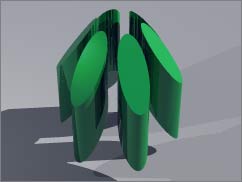 You should have something like this. ( I added the fill light and material because it was very hard to see. You know all about fill lights, and enough about materials to make one like this.)
 Now, group this object, name it something like Pylon Ring, center it, and copy it. Save this document, open the Temple, paste, and size to taste. You can give it a nice material now, or you can wait until later for that. Render to see how it looks. Then save this document.
Now, the next thing we need is a nice mountain or two for the background. If you have already made one you like, go ahead and open it, but Save As because we are going to change the material.
Otherwise, open a new document, and make a mountain you think would be good for the background of this piece. I'll wait for you.
When you are ready, with your mountain all set to go, open the Material Editor.
You may have noticed that there are four columns for Components in here. So far, we have mostly used components in Column A, with Column B or C used only to replace A components in certain channels.
But they can also be blended, and that is what we are going to do now.
First, so you can see how it works, we are going to use two very different textures, and blend them according to what is known as the AB blending mode.
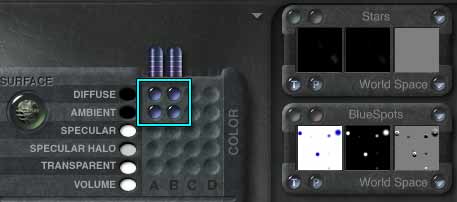
Click in column A of the Diffuse and Ambient Channels; then click on the Texture Library triangle in the upper right corner of the Component palette that will appear. Choose Clouds > Stars from the menu.
Now, hold down Control/Ctrl, and click in Column B. Another component will be randomly chosen, and both dots will be filled. Choose Basic > BlueSpots for this texture.
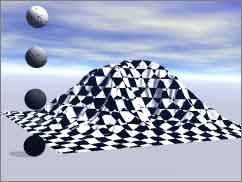
 Close the Editor, and type Command/Ctrl-R to render. The bottom part is black, with white spots. The top is white with blue spots. In between, the color fades from one to the other.
That's the way that AB Blending works. It all depends on altitude. The A component is on the bottom, the B on the top, and it blends between. The Altitude is determined by the highest thing in your scene.
 |
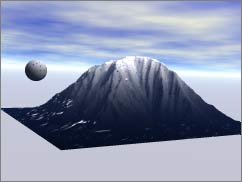 |
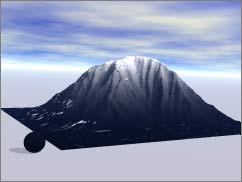
| Ball Low - Highest altitude; top of Mountain | Ball Medium - Mountain still unchanged |
 |
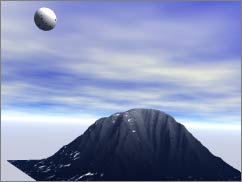 |
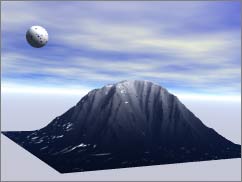
| Ball High - Mountain becomes darker | Ball very high - Mountain mostly dark |
Try this. Open the material lab, and copy this material. Now create a sphere, land it, and paste the material onto it. Render, or just look at the Nano-preview. Almost black, isn't it?
Move it upwards on the Y axis, and watch what happens to it as you go. Keep an eye on the Nano-Preview, and make a lot of stops so you can see the effect. Watch the mountain in the background, too, and notice what happens to it.
The higher you push the sphere, the lighter it gets. Push it high enough, and the mountain starts to get dark. Higher still, and the mountain will be all black.
Textures blended by Altitude, as determined by the highest thing in the scene. AB Blending.
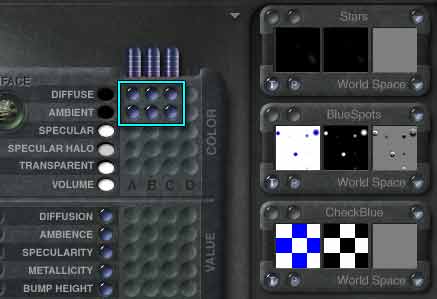
Alright. Select the mountain, and return to the Material Lab. This time, we are going to look at ABC blending; so hold down Control/Ctrl, and click in column C of the Diffuse and Ambient Channels. This time, choose Basic > CheckBlue as the texture. Take a look at that preview!
 ABC Blending mode blends texture A with Texture B according to the information in the Alpha channel of texture C. (In that middle area, remember?) White areas get A, Black get B, and gray get a combination.
Often C is a slope or altitude texture; but as you can see, you can use anything. It's a great way to get interesting materials.
Leave the editor, and take a look at this one on the mountain. Move the sphere now, and it will have no effect on the mountain at all. (The sphere itself, of course, will still change color as its altitude increases, because it still has an AB blended texture on it.)
Two textures, blended according to the alpha information in the third. ABC blending.
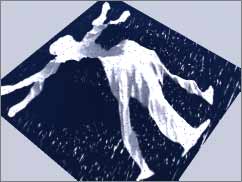 And, of course, there is nothing that says that any of these have to be procedural textures. Go back into the material editor, and click on the P under the thumbnails of component C to call an image. Leo is automatically chosen, unless you have been working for a while, and have other images in the Picture Editor, in which case it's random. The information in his alpha channel is spread all over the mountain; but if you look from the top, it's him.
Alright. Now that you understand that, it's time to pick a custom texture for your mountain. You can start with a preset material, or you can hold down the shift key, and choose from the preset textures. Don't forget that you also know how to change the color of the textures, and how to add an alpha channel if you find a texture you want to use for component C that doesn't have one. (The same way we added the bump; open the Deep Texture Editor, and click on the A by the preview in the Component Palette there.)
 If you don't see anything that suits you, and you have a lot of time and feel like playing for a while, you can even begin to discover your own textures. Go into the Deep Texture Editor, and look at one of the Palettes there. On the right side, under the Output Type (CAB) buttons, there is a button that looks like it belongs on a watch, much like the ones on the main palette. If you hold your mouse over it, the text area says, "Randomize Component n." If you click on it, a new texture will be randomly generated.
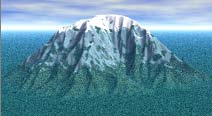
Unlike the other random generators in Bryce, this one can turn out some very nice textures. This mountain, for instance, uses two that I just generated that way in the A and B channels, with Basic Altitude in the C channel.
(The Deep Texture Editor is very powerful, and I'm sorry that I don't have time to show you more of it right now. But you can start using some of it, anyway.)
When it looks good to you, save the file (also save your textures and materials as presets, if you really like them,) copy the mountain and paste it into the Temple scene.
 |
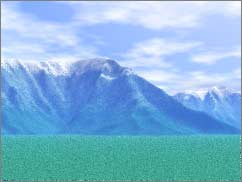 |
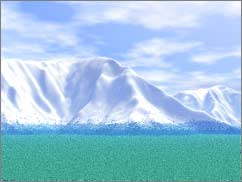
| Too Much Snow | Texture Components Resized |
Now, as you know, in order for the haze and other atmosphere effects to make your mountains look distant, it helps to make them really, really big. But that kind of size can change the materials, putting the snow line in a different place, ruining the effect of the striations you so carefully set, and so on.
The answer, of course, is to change the size of the materials, too. You already know how to do that, under the Greenish Editor dot. You can also adjust the position, rotation, or whatever else it takes to make your materials look just the way you want them to.
When you are happy with them, save the Temple document, and open a new one.
We will continue on Page 3.