Note: I haven't used Bryce in years; so these tutorials are archived "as is." I can't accept questions, because I don't remember the answers.
This is page 3. If you haven't finished page 2, please do so before starting this page.
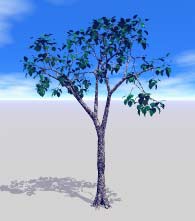
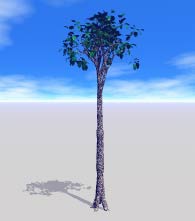
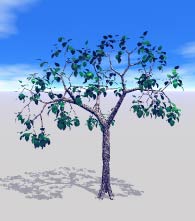
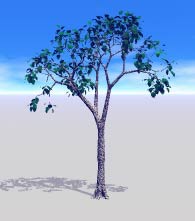
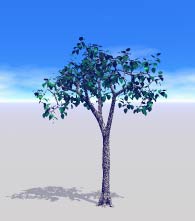
| Effect of Branches per Segment on Tree Shape - Note even leaves are affected | |
 |
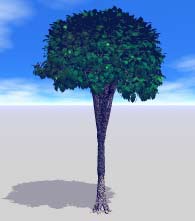 |
| 1 Branch per Segment | 4 Branches per Segment |
Still exploring the Tree Lab.
The second slider in the Branch/Trunk section is Branches per Segment. Each limb is divided into a number of segments (determined by the slider below this one.) This slider lets you set minimum and maximum values for the number of possible branches that spring from each segment. The greater the spread, the more irregular the shape of your tree.
Higher numbers, of course, generate more branches. Don't forget, though, that more branches means more rendering time.
If you set the Branches per Segment number too high, it can lock up your computer. So be careful. Ease up on a high number, to make sure you really need that many. (You are probably better off with more segments, instead.)
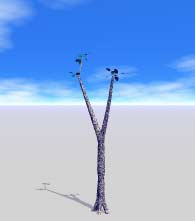
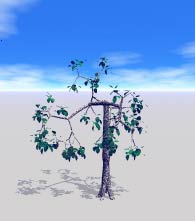
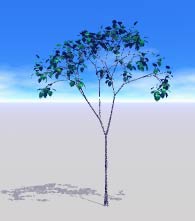
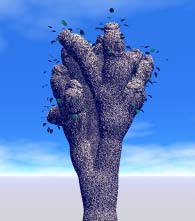
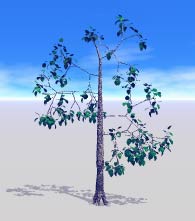
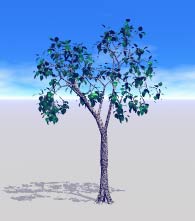
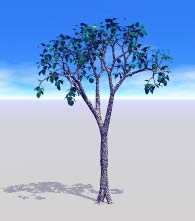
| Effect of Number of Segments on Tree Shape - Note even leaves are affected | |
 |
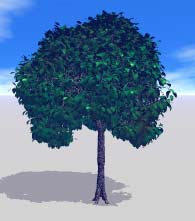 |
| 2 Segments | 15 Segments |
The next slider is Segments. A segment is the place where new child branches can begin on the parent branch. The higher this number, the denser and wider your tree will become. Very low numbers can result in almost no branching at all. Once again, though, if you use values that are too high you can bring your computer to its knees.
A high number of segments is the best way to get fuller, denser trees, though. And fuller and denser means older and larger.
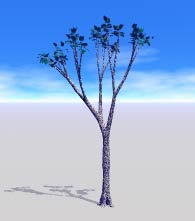
| Effect of Branch Start Angle on Tree Shape | ||
 |
 |
 |
| Branch Start Angle 2 | Branch Start Angle 90 | Branch Start Angle 180 |
Below that is Branch Start Angle. This slider determines the angle that a branch has in relation to the thickest part of the tree. The lower this number, the higher your limbs will reach. The higher, the more they grow out, not up.
| Effect of Branch End Angle on Tree Shape | ||
 |
 |
 |
| Branch End Angle 2 | Branch End Angle 90 | Branch End Angle 180 |
The Branch End Angle, below it, determines the angle at the thinnest part of the tree. (The end of each branch, as well as the top of the trunk.)
For this, as well, low settings cause the branches to grow upwards, and high ones cause them to droop. The two, in combination, do a great deal to control the shape of your tree.
| Effect of Trunk Thickness on Tree Shape | |
 |
 |
| Trunk Thickness 2-10 | Trunk Thickness 99-200 |
The next Min/Max slider controls trunk thickness. The maximum set here is the thickness of the trunk at the base of the tree. The Min is the thickness of the tiniest twigs at the end of the branches. Generally speaking, the thicker the trunk, the older the tree will appear to be. Of course, old trees have lots of segments and branches as well, so they will take longer to render.
| Effect of Branch Thickness on Tree Shape | ||
 |
 |
 |
| Branch Thickness 5-10 | Branch Thickness 45-55 | Branch Thickness 90-100 |
The Branch thickness is the percentage width for child branches, not an actual thickness. In other words, if you have this set for 70, as the tree branches out each branch will be 70% of the width of the one it branched from. This will be true for all the branches, from the first split in the trunk to the tiniest twig. If you set a range, of course, the child branches will vary in width.
This has a great deal of influence over the shape of the tree, since thin branches tend to grow out of the tree, while thicker ones tend to... well... branch. Look at the examples to see what I mean.
As with any other characteristics, a range means that the branches vary in thickness. The larger the range, the more random and untidy your tree will appear.
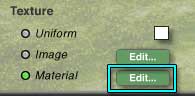 At the bottom of this section is an area that allows you to choose material for your trunk and branches. (You can't choose different materials for them. There can be only one, and it goes on both.) The first choice is Uniform. That gives you a solid color, and you can choose it with the color swatch. This is the best choice for distant trees, where the texture would be too small to discern anyway. It renders the fastest of the three.
The second choice is Image. This allows you to use a picture for the tree bark and branches. If you choose it, you can also edit the image. Clicking on that button will take you into the Picture Editor that you are already familiar with. But in most cases, you will also need to visit the Material Lab to make the picture work.
You do that by clicking the next button, Material, and clicking on the Edit button there. This is the best choice for close up trees, I believe. Bryce 5 comes with a number of Trunk material presets, corresponding to the varieties of trees in the Shape menu. And, don't forget, you can tweak them the way you learned to tweak the material for your terrain.
In fact, if you are going to be making a large tree, you will have to tweak the texture, because otherwise it won't fit the scale of the tree; the pattern will be too large. Why don't we explore that now?
Click on Material, if it's not already green, to enable it. Then click on the Edit button to the right of it, to enter the Materials Lab.
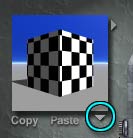 Go to the Presets, (the flippy triangle to the right of the preview) and choose Simple and Fast. Use the scroll bar to the right to scroll through the presets until you find the black and white checkerboard. I know, it's not good for trunks, but I want to show you something. Change the Preview to Box, using the flippy triangle on the bottom right beneath the picture.
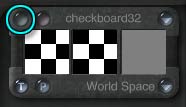 Now, click the greenish button at the top left corner of the Component Palette.
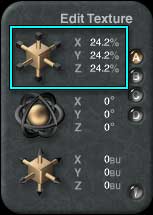 A new palette, called Edit Texture appears. (Drag it off the other palettes to the right, so you can see the whole Material Lab palette.) You can use this to change the size, rotation, or placement of your texture. The tools should look familiar to you; they are nearly the same as the ones on the Edit palette.
The one we are concerned with here is Size. Notice that it is expressed as a percentage. This is a frequency percentage. (All textures in Bryce are actually based on noise.) Now, listen carefully, because this can be confusing.
O% is as large as it gets. The higher the percentage, the more frequently the pattern or noise is repeated. So, the bigger the number, the tighter, or smaller, the texture. (Negative numbers don't make it larger than zero; they increase the frequency again, making the texture tighter, but on the other side of the axis.)
Click on the number, where it says X 24.2%. A text field will come up. Type in 50, hit tab, and type in 50 again until you have changed the size on all three axis. Then hit return. Notice that the little squares on the checkerboard are all much smaller.
Type in a smaller number, say 5, to see the squares get larger.
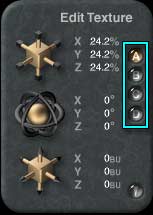 Okay. Now choose a trunk type, say Tulip. (Third from the left in the top row.) Notice that it has two components. You will have to change the size in both of them to keep the same texture.
Look carefully at the Edit Texture palette, and you will see that there is a row of letters down the right hand side. Those letters correspond to the Components. The one you are working on will be highlighted in either blue or amber. So, to edit the first one, double the numbers that you see there. Then, click on B to change to the B component, and double those values, too.
Close the Material lab. You have reduced the size of the bark texture, so it will look more natural on a larger tree. Easy, wasn't it?
| A Few Leaf Shapes | ||
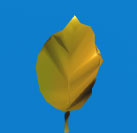 |
 |
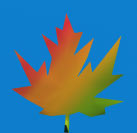 |
| Beech Leaf | White Oak Leaf | Silver Maple Leaf |
The last parameter for your tree is foliage. The first thing you can choose is the Shape of your leaves. There are a number of presets, corresponding once again to the Shape presets. These will actually give your trees the shapes of the leaves the real tree species has, so you can make recognizable trees. You will find the presets under the Triangle, of course.
At the bottom of the list is "User Leaf." Remember that, because we are going to be coming back to it.
| The Effect of Leaf Size on Tree Shape | |
 |
 |
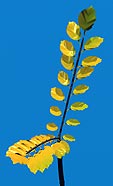
| Leaf Scale 0 | Leaf Scale 20 |
The second slider controls the scale of the leaves. This is important, because it controls the apparent size, and therefore age, of your tree. The larger the tree, the smaller each leaf will be in comparison. Since we are used to thinking of leaves as being more or less standard in size, you give important clues about tree size, and therefore tree age, this way.
The scale is the size of the leaf as a percentage of the tree size. So a leaf with a size of 50 would be half as large as the tree itself! Since that would be ridiculous, the slider only goes up to 20.
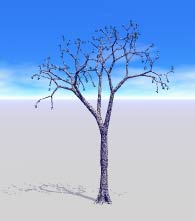
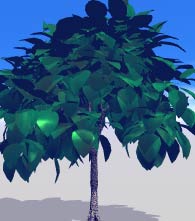
| The Effect of Leaf Number on Tree Shape | |
 |
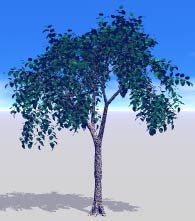 |
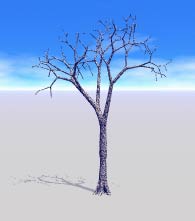
| Leaf Number 0 | Leaf Number 20 |
The next slider controls the Number of Leaves on each branch. Dragging right increases it, of course, while dragging left decreases it. Once again, a lot of leaves take a long time to render, so be careful. However, the number of leaves also says something about the age and health of the tree. As a general rule, of course, the smaller the leaves the more you will need to fill out the tree.
Using low numbers can evoke a scene in late fall or winter, since you can have trees with no leaves on them at all.
Using higher numbers will make your trees appear to have longer branches, since unless you are using the "Bunched" leaf distribution below, Bryce will add enough twig length to allow the number you have specified to fit.
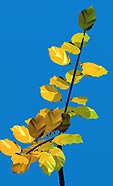
| Leaf Distribution | 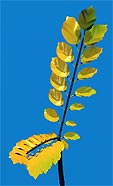 |
 |
| Stacked | Staggered | |
 |
 |
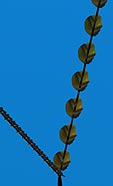 |
| Spiral | Bunched | Coniferous |
The next section allows you to determine the Distribution of the leaves on your tree. Just click to choose the one you want.
Stacked arranges them in pairs on either side of the branch. Staggered arranges them alternately on either side of the branch. Spiral puts them in a spiral up the length of the branch. Bunched sticks them all in a bunch at the end, and Coniferous places them along the middle lying down, like the needles on a cedar tree.
You can play with all of these for a while, if you want, but don't take too long. (Easy to do, since the Tree Lab recalculates the tree each time you change a parameter, which can take a while.) We still need to add a material to your tree, and there's a really fun thing we can do with that! It's on Page 4.