Note: I haven't used Bryce in years; so these tutorials are archived "as is." I can't accept questions, because I don't remember the answers.
Last lesson, as you recall, we explored the DTE and found out how it all works. This week, we are going to be using it, so the knowledge will stick in our heads and mean something to us!
Because of that, instead of just telling you what to do, I'm going to walk through the whole process with you, including the entire decision making process. Essentially, you will be looking over my shoulder and following along as I pull several textures together.
Last week we made a rock that was designed to sit in water for a scene with a river running through it. This week, we are going to make some more things for that scene.
 It would be nice to have trees growing next to the river, wouldn't it? But, instead of just using default Bryce trees, let's make some that have moss growing on the north side. (Well, okay, it will actually be on the East side, but we'll pretend that it's North.)
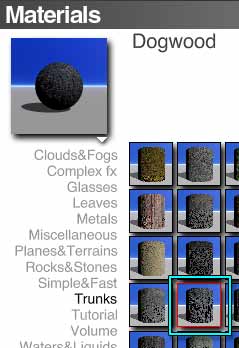
We'll start by shopping for a bark texture, because we are still going to modify existing things for a little bit longer. Create a cylinder, and take it into the Material Lab. Open the Presets, and go to Trunks. Let's use Dogwood. It's the second one in the fourth row.
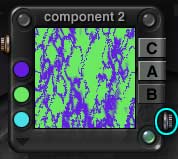
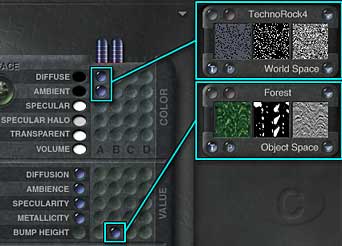 One look here in the Material Lab shows us that it has two Components. But that's alright, since the second component is used only for the bump.
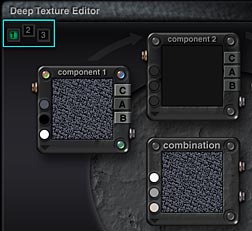 A quick check confirms that the first has only one component in the DTE. Let's see if we can combine the two Components used in the Material, and put the moss into the third component in the DTE, just to speed up the render time a tad.
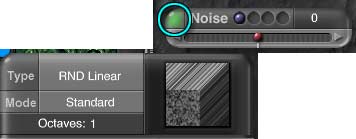
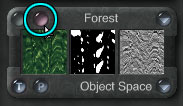 So, go into the DTE with the second component of the Dogwood texture; the one called Forest. Click on the pink button in the Forest palette.
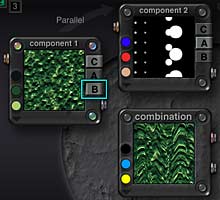 The bump is coming from the first component here only. We can tell, because it's the only one in which B has been enabled. (If it was a combination, we would have to rethink our strategy here.)
 First, we need to see how this was made. So open the Noise dialog if it's not already open by clicking the top left glassy, or the Noise button at the bottom of the DTE.
 The green corner shows us that noise is being used. (But then, one glance at the texture shows the same thing.) If we open the Noise Editor by clicking the green corner, we can see that the noise doesn't look like the texture in the Combination preview at all, though, so I'm betting there is Phase as well.
 Open the Phase dialog by clicking the glassy in the bottom right corner, or the Phase button at the bottom of the DTE. No, the corner is gray, so there is no phase on component one.
 While we are here, check the filter dialog, as well, by clicking on the Filter button or the top right glassy. The filter is also set to None.
 But that distortion is coming from somewhere. It's not component 2 in any way, because the blend mode is Parallel. Let's move the blue ball to the fourth position in the Phase dialog, and see if the combination has phase.
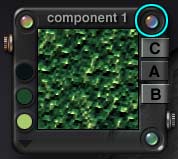
Ah! There it is. Notice that the corner is green.
![]() We'll have to apply that phase to the first component, not the combination, or it will wind up on the moss as well.
We'll have to apply that phase to the first component, not the combination, or it will wind up on the moss as well.
Let's think about this for a moment. It might be easier to make our moss in the first component of the Dogwood material, and then move that bump in here, instead, and continue to use 2 Components for the Material. We'll do it that way.
Click the X or tap the Escape/ Esc key to cancel out of the DTE.
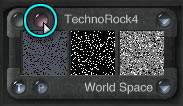 Open the first texture, TechnoRock4, in the DTE by clicking on the pinkish button.
 Alright, we need something that will look like moss.
Click in component 2 to enable it, and then click the silver randomize button a few times, because we may get lucky. Ah well. I don't know about you, but I had no luck. I'll just have to build this one myself. (If you did strike moss, by all means save it as a preset. (Hit the copper button, or shift-click the title of the combination window to get the texture Presets, remember.) Then come back and follow along with me anyway.
 Set the blending method to Combine for the two components, so that you are seeing what I'm seeing on my screen. (Click and hold the cursor on the word that is on the arrow between them, and choose Combine from the menu that appears.)
 We are going for a moss color, so set the colors to greens, and the mode to Linear Interpol 3. That will help us to visualize the moss on the bark texture that already shows in the combination window.
If you remember from last week, the top color won't be seen, because Combination blending replaces the color in the top swatch of the second component with the colors of the first component.
 Make sure that C, A, and B are all enabled, since we are going to be using all of them, and open the Noise Editor by making sure the blue ball is in the second hollow, and clicking the green corner.
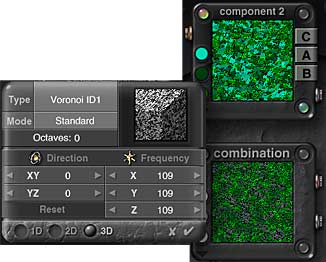 Now, I know that I want the texture to be like moss, and that means I want a kind of cell structure. From previous experience, I know that the Voronoi noises have that kind of structure. So, I'm going to spin through them quickly. (You can also check Appendix 1 from last week to narrow your choices.)
Start by setting the Octaves of your texture to 0, the direction to 0, and the frequency to around 100. (Remember from last week that you can simply set one of the set of numbers (Direction or Frequency) and then hold down Option/Alt and click on that one to set the others in the set to the same value.)
Then, just run through the list of Voronoi noises under Type until one looks right. Don't stop when you get one that is "good enough," because an even better one might be just a little farther down the list. I like Voronoi ID1 the best. (If your taste differs, use the one you like.)
Try increasing the octaves, and checking a few of the mode settings while you do so, to see if it looks much better. If the difference is only marginal, remember that each level of complexity you add here adds render time later.
I think that 0 octaves will do quite nicely. Now, we need to make sure that the texture is 3D, since we are going to be putting it on a rounded surface, so check the hollows at the bottom of this palette. If it's not already 3D, make it so. I'm increasing the Frequency just a hair, but the Direction looks good to me. You can play with the settings a bit more if you like. I'm moving on here.
When you are ready to move on too, join me on Page 2.