Note: I haven't used Bryce in years; so these tutorials are archived "as is." I can't accept questions, because I don't remember the answers.
This time, we are going to explore Brycian weather. It's finally time to dig into the Sky & Fog palette, and the SkyLab. If you want to do the exercises, you'll need the files in Lesson4.sit or Lesson4.zip.
Shall we begin?
Please open Bryce, if it's not open already.
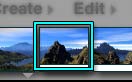
![]() First, so that you can see the effect of some of what we are about to do, I want you to multi-replicate a terrain, just like you did with the blocks in the child's pull toy.
First, so that you can see the effect of some of what we are about to do, I want you to multi-replicate a terrain, just like you did with the blocks in the child's pull toy.
Create a terrain, or open one that you made and like. (If you open one, remember to Save As... so you don't overwrite the other file.)
Go to the Menu Bar, choose Edit > Multi-Replicate, and make about 6 of them, all at 100% size. (The other settings don't matter at the moment.)
Now, while they are all still selected, go to the little gray color swatch right under the A in the Icon Column. We are going to put them all in the same family, so you can select them easily later, no matter what else is in your scene. Click on that swatch. (Don't click and drag, or it will close the second you release the mouse button. Just click.)
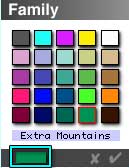 A little Family color palette opens, with 25 swatches. Pick one (not yellow (Family 4,) beige (Family 9,) magenta (Family 3,) burgundy (Family 21,) or bright blue (Family 17,) because those are default colors for lights, cloud planes, water planes, rocks & trees, and the camera. But any of the others will do.) You will notice that the text under the swatches changes to give the number of the family, and that text is highlighted.
Type in "Extra Mountains," so you know what that family is. If there aren't any colors you like, or that you will be able to see against your paper choice, you can edit the colors. Just click on the swatch at the bottom, and the normal color picker opens. Option/Alt click if you want the advanced picker, and Option/Control click on a Mac, or Alt/Ctrl click on a PC if you want the regular color picker for your system, as always.
Hit return, and the palette closes.
Notice that the color swatch in the Icon Column is now whatever color you picked.
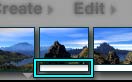
![]() Alright. Go to the Top view, so you can see what you are doing. Now spread those mountains out, really far. Stagger them, but keep them in the line of sight from the camera.
Alright. Go to the Top view, so you can see what you are doing. Now spread those mountains out, really far. Stagger them, but keep them in the line of sight from the camera.
Look at the Nano-Preview. (Make sure it's set to Camera view.) Some of those mountains are probably too small to really see. And if you can't see them, you also won't be able to see the atmospheric effects I want to show you.
We are going to select all the extra mountains at once, and enlarge them.
Look at the Selection palette, at the bottom of the screen. See the little color icon, with a reddish stripe, a white stripe, and a turquoise stripe? That is the icon that allows you to select objects by family. Click on it.
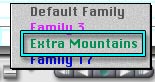 A pop-up menu appears, with the names of all the families currently in your picture, in their own colors. Choose Extra Mountains, and all the mountains are selected.
You can group anything you want to be able to select easily in a family like this, just by using the Family Color swatch on the Icon Column, and select them all just this quickly, even if they are in different groups, or composed of different primitives.
Go to the Resize tool, and enlarge the mountains so you can see them easily in the Nano Preview.
If you need to, spread them out again. We aren't going for a lovely composition here, we are setting the scene to be able to see atmospheric effects.
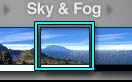
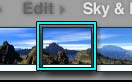
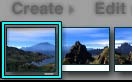
 Add a water plane, to enhance the effect. Use the pan tool (that's the Spacebar, remember,) to crop the picture so that you can see plenty of sky. You are aiming for something like this, where you can see all seven terrains.
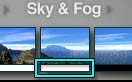
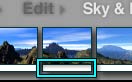
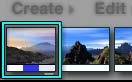
 This is what it looks like from the top, with the terrains below ground invisible to aid in clarity.
Remember, the larger the mountains, the more realistic it will look, and the better the atmospheric effects will work. By big, I really do mean big. The terrains above are between roughly 500 B and 600 B on the X and Z axis. In contrast, a newly created terrain is around 82 B.
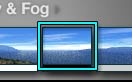
Now, click on the palette title to get the Sky & Fog palette, just as you do to get the Create or Edit palette.
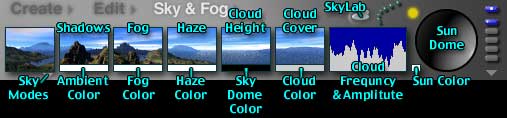
You will see a number of thumbnails, a black circle, and a set of memory dots, just like the ones for the camera. It all looks like this.
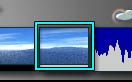
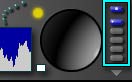 We are going to start at the right, so I can show you the sun and cloud controls first. As you play with the other controls, you will want to move these around a bit, too, to see the effect they have.
So, starting at the far right, those memory dots work exactly like the ones for the camera. When you have a sky you like, you can click one of them, and it will remember those settings. Then, you can experiment as much as you like, and you can always go back to the one you liked later. Option/Alt click on one to empty it so it is ready to save another.
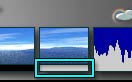
The one on the top is the default sky; this one. You can always come back here, if things go terribly wrong.
 Want to see how strange your skies can get? See the little row of dots? That is the Sky Randomizer. When you click on it, strange and random things happen to the sky; things never seen in nature, at least on this planet. Sometimes, very rarely, you will get an actual decent, usable sky this way. But not often. Go ahead and click a few times, to see what I mean. Watch the Nano-Preview to see what you are getting.
(If by some miracle, you get a sky you actually like, by all means save it as a preset; you aren't likely to ever come up with that combination again. You do it exactly the same way you save preset materials. Click on the sky Presets triangle, next to the Sky & Fog Palette title, click Add, and name it.)
When you have seen enough, click the default memory dot to return to the normal, default, sky.
 Okay. The black circle is the Sun Position Dome. It's really a hemisphere, with the top towards you. The light spot is the sun. Think of it as the sun reflecting on an upside down, round bottomed bowl. You can click and drag on the light spot to set the position of the sun in the sky.
If you haven't changed the default, the position closest to you, at the bottom of the dome, will put the sun directly behind the current camera. Moving it to the right will move it to the right, and to the left will move it left. Pushing it to the top of the dome will put it on the horizon in front of you. You get the idea. (If it doesn't work this way for you, go to the flippy triangle under the memory dots, and make sure Link Sun to View is enabled. We'll talk more about that later.)
Try it. If you push it too far, it will go below the horizon, and the moon will come out.
The Brycian sun and moon are linked, and are on the opposite sides of the dome. You can never have both the sun and the moon in the sky at the same time unless they are very low on opposite horizons. (Well, you can't unless you use a picture object for the moon. We'll get to that later.)
 The color swatch to at the bottom of the sky dome sets the sun color. It works the same way all the other color swatches in Bryce do. Go ahead, and try it out. The sunlight affects the colors of everything in your scene.
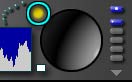 Above that, you can see a little yellow sun. If you click on it, it will change to the moon. Give it a try.
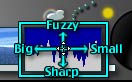 Next to that is a box with a jagged line in it. This sets the cloud frequency and amplitude. If you click and drag on it, you will be able to see the difference in the clouds when you let go.
Dragging left and right changes the frequency, or the size of the clouds.
Dragging up and down changes the amplitude, or how distinct the individual cloud shapes are.
If you watch the Text Display area, you will be able to see the actual numbers you are getting. Play with it for a moment or two, to get the hang of it.
 Next to the left is the Cloud Cover. If you click and drag right and left over the thumbnail, you will see that it is interactive. Also keep an eye on the Nano-Preview, which will update when you release the mouse button, and the Text Display Area, which updates continuously. You will notice that as you drag left, you have fewer clouds. Dragging right increases the amount of cloud cover, until the sky is completely overcast.
(All these thumbnails are quite similar, I know. If you get lost, just look at the Text Display Area. It will tell you where you are, and also tell you the numbers for the things you are doing.)
 Directly below the thumbnail is a color swatch. This sets the color of the clouds, and works exactly like all the other color swatches in Bryce, except that you can see the old color on the left as you change it. Go ahead and play with it. As you notice, it doesn't have as much effect as you think it might, because it only controls the color of the Cumulus clouds. If you are using the Bryce default sky, there are no Cumulus clouds. We'll be enabling them soon, and then we will come back here.
 Moving left again, the next thumbnail is for Cloud Height. This not only controls how high the cloud ceiling is, it also controls how high the haze is. Dragging to the right increases the height, and dragging to the left decreases it. Try it out.
 The color swatch here controls the sky dome color. That color influences the color of everything in your scene, even if you aren't using the sun at all. (Yes, you can turn the sun off in Bryce. We'll get to that soon.) It's a great way to add atmosphere, giving that cold blue cast to snow scenes, and the warm golden tint to summer afternoons.
Try it out.
 The next control to the left is the Haze Control. Dragging to the right increases the amount of haze in your scene, and dragging to the left decreases it. (See why you have all those mountains? They really let you see the haze, don't they?) Haze isn't to be confused with fog, because it behaves quite differently. If you want the haze band at the horizon to be thinner, lower the cloud height. The two are connected, remember.
Play with this one for a moment, and keep an eye on your scene in the Nano Preview. Now play with this one and Cloud Height at the same time. See how they interact?
 The color swatch controls the haze color. A light haze color will brighten your scene. A dark haze color will make it darker, naturally. This can be very effective in night scenes. But be careful. Too much dark haze can block the night sky. Too much light haze can make the scene unnaturally bright.
 The next thumbnail allows you to set the fog for your scene. You can set both density and height. The top of Bryce fog is smooth and even; so use it with care. (There are other ways to get more ragged fog, and we'll be looking at one later.) Dragging up increases the fog height, dragging down decreases it. At the same time, dragging right increases the fog density, while dragging left decreases it. Remember to watch the Text Display Area, as well as the Nano-Preview, to see just what you are doing.
 The color swatch beneath this thumbnail controls the color of the fog, just as you would expect. You can make literal pea-soup fog in Bryce, but it's not as attractive as you might think.
 The next thumbnail controls the shadow density. This allows you to make heavy, dark cast shadows, or light ones. It only effects cast shadows, though. In other words, if you have a sphere in your scene, the shadow on the unlit side of the sphere itself is controlled by the Ambient Value setting in the Materials Lab for that sphere. The shadows the sphere casts on the table it's resting on are controlled here. You'll be able to see it in this scene, though, because the ridges in your mountains cast shadows on the valleys.
Dragging to the right increases the density of the shadow. Dragging to the left decreases it. Take a look.
 The swatch below this thumbnail controls the ambient color of your scene. It blends with the Ambient Color you have set for each object in the Material Lab. If the object has no Ambience Value, this setting will have no effect on it. The higher the Ambience Value, of course, the more the object will pick up this color.
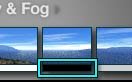
 The last thumbnail sets the kind of sky you have. It's the Sky Mode control. If you click the flippy triangle under it, you can see the four available modes. You can also get them by clicking on the thumbnail to cycle through them, or by clicking and dragging to cycle through them more quickly.
The first mode is Soft Sky. It's the default, and uses slightly lighter colors and softer shades to compose the parts of your sky that you don't set directly. (A lot of Brycian sky is calculated, based on a sky model. This is why the colors change as you move the sun closer to the horizon.)
The next one is Darker Sky. It uses darker versions, and is how you get brooding skies or brilliant sunsets.
 After that comes Custom Sky. This one allows you to set your own values for several things, overriding the calculations that Bryce would ordinarily use.
Let's examine this one for a moment. Use the menu to select Custom Sky.
There are three color swatches here. The one on the left sets the Sun Glow color. It controls the color of the halo around the sun. Push the sun close to the horizon on the far side of the Sun Position Dome, so you can see it in your picture.
Now, choose a color. Notice how the sky around the sun changes? This color will still interact with the color of the sun, as you can easily see if you choose an odd sun color, like green, with a red Sun Glow. But the tint is still there. Turn off Custom Sky to see the difference.
The middle swatch controls the actual color of the sky. This one is really nice to have. Make sure that Custom Sky is enabled again, and pull the sun directly overhead (the center of the Sun Position Dome.) Now, change the color for this swatch. Pretty neat, huh? It's easier to see if there aren't many clouds, so if there are, you may want to clear the sky a bit.
The haze color also affects the color of the sky, of course. If you want a green alien sky, but still want haze, you may want to set them both to shades of the same green. Do this by picking up the color of the Sky Color swatch with the eyedropper from the Haze color swatch, and then holding down Option/Alt to get the advanced color picker so you can reduce the saturation, and increase the lightness, of the haze. (Or you may want to make it darker, depending on the atmosphere of your planet.)
The swatch on the right is for the Horizon color. This color adds a subtle tint to the sky near the horizon, and acts more strongly on things that are actually below the horizon, or ground level. If you have a valley in your scene that is below ground level, and you have haze, this color will be visible there. (If you have no haze, you won't be able to see it.) It also tints Stratus clouds near the horizon.
The last Sky Mode choice is Atmosphere Off. It turns all the other things off, and is mostly used when you need to render quickly for position, when you want things rendered against a solid background for post processing in a different program, or when you are composing an indoor scene, and don't need atmosphere. The color swatch here determines the color that is rendered in place of atmosphere. It will form the backdrop of the scene.
 Alright. Now, you may have noticed that some of these controls were a bit difficult to manage. Because of that, you can also set all of these things interactively and/or numerically using the Sky Lab.
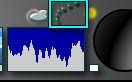
Click on the little icon of a cloud with a rainbow next to the Sun Position Dome. The Sky Lab will open. This is where you can really get to work on your Bryce sky. This is where you get stars, rainbows, comets, and all kinds of other wonderful effects.
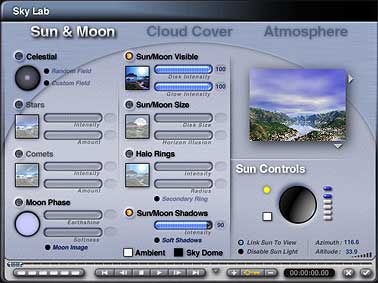 There are three tabs, which will take you to the three different parts of the sky lab; Sun & Moon, Cloud Cover, and Atmosphere. When you first open it, it might look something like this. Well, okay, not exactly like that, because I've already set the preview to Render in Scene.
That preview works the same way the others do. When it first opens, it will show the scene from whichever perspective camera (Camera or Director's View) you last used. But you can move it around, as usual, by clicking and dragging to view it as if it were the center of a virtual trackball, holding down Control/Ctrl, clicking and dragging to zoom in or out, and holding down the spacebar, clicking and dragging to pan around the image. On the Macintosh, you can also hold down the Command key, click and drag to use the camera as if it were on a tripod. Option/clicking brings you back to the default camera view; but be careful. That's the default, not the one you are using, and you may wind up inside a mountain! If you need to, you can always cancel out and open the Sky Lab again to return to the view you started with.
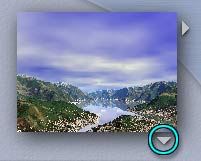 I suggest that you use the Render in Scene. It will allow you to get a good idea of what the controls do, without a lot of running back and forth in and out of the lab, and rendering. You will find it under the Flippy Triangle below the lower right corner of the Preview.
Lets start Page 2, and explore just what each of the things in here do.