Note: I haven't used Bryce in years; so these tutorials are archived "as is." I can't accept questions, because I don't remember the answers.
This is page 5. If you haven't finished page 4, please do so before starting this page.
 |
 |
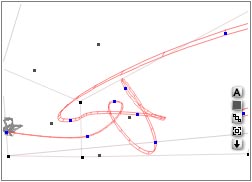
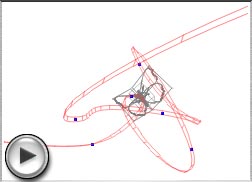
| Newly Made Path | Trajectory Still Exists |
So, what do we do if we want to do more than you can do with trajectories?
The answer this time is Paths. Trajectories are attached to objects. Paths exist on their own, and can have as many or as few objects following them as you desire. They can also be animated themselves, and can have their own trajectories (or follow different paths themselves.) Best of all, the points on a path are not points in time; just points in space. So you can change it all you want without the acceleration and deceleration you found with the Trajectory.
A wise animator always saves a copy of the file with the trajectory, just in case, before she makes it into a path. So do that now.
It take a couple of steps to put the butterfly on a path, instead of leaving it with a trajectory. The first step is to make the path, and the second is to attach the object to it. (At that point, the object's own trajectory is irrevocably lost; so be careful.)
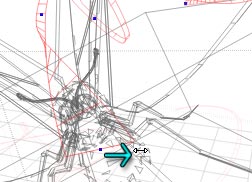
Make the path by selecting the object with the trajectory you want to change into a path, going up to the Objects menu, and choosing "Create Path." Or you can use Option/Alt-P if you prefer keyboard commands. You will notice that this cannot be undone. But, at the moment, the trajectory is still intact as well. So if you hit the wrong keys in error, and accidentally made a path, you can just delete it.
 If nothing with a trajectory is selected when you Create a path, Bryce will provide a simple Sine Wave path.
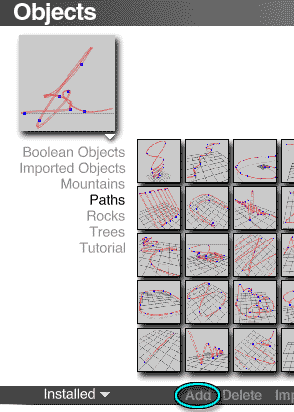 If you really like the path, you can store it as an Object Preset, just the way you store any others. (Select, and then click Add in the Object Preset dialog under the flippy in the Create title.) In fact, there are several paths in there already. When you have a path selected, by the way, the preview will be a wireframe, so you can see what you are storing. (Paths are invisible in rendered pictures.)
 |
 |
| Drag from Link icon to Path | Butterfly is attached to path at point of Drag |
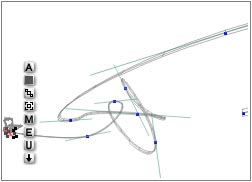
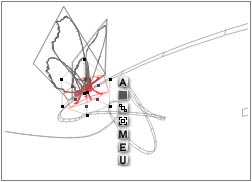
To put the butterfly on the path, he will have to be linked to it. Linking is setting up a Parent/Child relationship. The Path is about to become a parent. Its child, of course, is going to be the butterfly.
To do so, first Save your file, and then, as always, either choose the path under the Linking tab in the butterfly's Attributes, or drag from the butterfly's Link icon to the path. The butterfly will be attached to the path at that point. (This can be adjusted later.)
Notice that, as soon as you do, the butterfly's own trajectory vanishes. Also notice that this cannot be undone. (Nothing about paths can be.) So be very, very careful. That's why we saved first. Save again, with a different name, and don't write over that original file. You may need it at some time in the future.
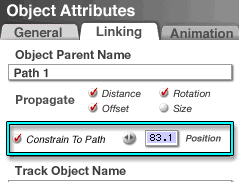 Open the Objects Attribute, if it's not already open, and take a look at the choices under the Linking Tab. You will notice that there is new one; Constrain to Path, followed by a number. This number isn't a margin of error for the constraint. Things are either constrained, or they aren't. (They don't have to be. They can just be Children of the path, and follow it around when it is moved, or inherit its characteristics.) This is a way to show Bryce where the object is on the path at the current time as shown by the scrubber.
It's a little tricky, though, because it's a percentage that means "This percent of the way through all the points on the path." So, if you have 6 points on the path, and 5 are clustered at the end, the 50.0 position won't be halfway between the beginning and end of the path. It will down there at the end, between points 3 and 4.
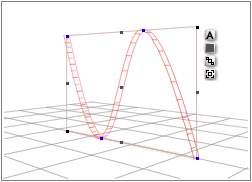
In the figure above, for instance, this is the position that the butterfly currently occupies, as seen in the figures above that. To put it at the beginning of the path in frame zero, all I have to do is make sure the scrubber is at frame zero, and then type "0" into the Position box.
You don't have to worry about doing any math here if you don't want to, though, because you can also place your object on the path visually. Just scrub to the time when you want it to be at a certain point on the path, drag the object where you want it (it will stick to the path, now, so you only have to drag right or left) and make a keyframe or allow the computer to make one for you. Simple as anything.
 |
 |
| Constrain position Zero for Frame Zero; make key frame. | Scrub to last frame, drag to end position; make key frame. |
You will notice that the butterfly doesn't have the keyframes that were on his trajectory any more. So if you want him to fly smoothly along the whole path, all you have to do is go to frame zero, and put him at the beginning, and make a key frame. Then go to the last frame, drag him to the end, and make another one. (If you are adding them manually, the one you want is "Path Position.")
Presto! Smooth motion over the whole path.
 If you select the path itself, you will find that you can edit it exactly the same way that you were just editing the trajectory. You can move points in space, or change their Tension, Continuity, and Bias exactly the same way. (However, you won't be able to see the Tangents. They aren't visible on paths.) In fact, when working with paths, you can select more than one point by shift-clicking them, and change all of them at once.
You can also do something more. You can twist the path.
Hold down Option/Alt, and move your mouse over a point. Now drag. Notice that the path is twisting, and the twist numbers are showing up in the Text Area. Play your animation.
You will notice that this is the perfect way to correct upside down flying, which sometimes happens when using Align to Trajectory or Path. If you twist while the butterfly is on the point you are twisting, you can place him upright with no trouble.
If you had Auto-Key enabled, any you weren't at Frame Zero when you twisted the path, you will notice that as you play, the path itself changes.
Why? Because paths can be animated too. That way, several objects that are on the same path may not follow each other exactly. It's a powerful device, when you get the hang of it.
In the meantime, find the extra keyframes by clicking through them, and deleting them. (Just hit the - button next to the yellow key. It will give you a choice of what objects and channels to delete the keyframes from, exactly as if you were not using Auto Key. If you really weren't using Auto Key, you shouldn't have any extra keyframes unless you put them in there. If you did; stop that! Only add keys where you actually want them.)
Now, try twisting your path again. It will stay put this time.
 Okay, all of this is fine. But what if you want to extend the path, or add more points to it? You can't just put the object somewhere and make a new keyframe. That won't add a point; it will just put the object at that spot on the path at that moment in time.
The answer this time is to select the path, and then hold down Option/Alt and click on it. (I can't find it in any documentation anywhere, but I've noticed that once something is animated, I can't add points to a path if it has objects attached to it. If this happens to you, just unlink the object, add the point, and then re-link your object. You will have to set up the keyframes for it again.) A new handle will be added near where you click. (For some reason, it may not be added exactly where you click, and you may have to manipulate it to put it just where you wanted it.)
Be careful, though. Remember, you can't undo anything you do to a path. It pays to be sure that you have a backup copy, just in case. (Or save a preset of the path, and work on that.)
One more thing about paths. In this instance, the butterfly was already aligned to the path. But just so you know it, objects are aligned to paths exactly the same way they are aligned to trajectories. The control in the Object Attributes box says "Trajectory," but it works for either one.
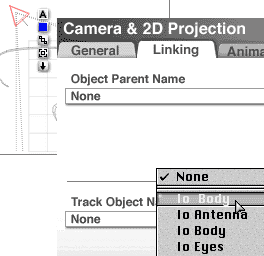 At the moment, the camera is stationary, while the butterfly flits in and out of the scene. But you can also automatically set the camera up to track the butterfly as it flies. To do it, all you have to do is enable Tracking in the camera's Object Attributes box.
Save this, and then try it out. Select the Camera, and open its Object Attributes. Go to the Linking tab, and click on the drop down menu under Track Object Name. A list of all the things available for tracking will appear. Choose Butterfly Body, and close the box. You will find that the camera instantly swivels to point directly at the butterfly, and there is a line attaching the two of them. (You will also notice that this doesn't have to be keyframed.)
| Click on the Tracking Icon | Drag to the Butterfly Body |
You can also set the Camera to track by dragging from the tracking icon in its Icon Column to the butterfly.
![]() If you run the animation while looking at it from the Top view, you will see that the camera follows the butterfly's every move. Run it while using the Camera view, too. Gives you a different, and perhaps somewhat dizzying, perspective, doesn't it?
If you run the animation while looking at it from the Top view, you will see that the camera follows the butterfly's every move. Run it while using the Camera view, too. Gives you a different, and perhaps somewhat dizzying, perspective, doesn't it?
Of course, no one in the real world can possibly follow a butterfly's flight as perfectly as that, and there are ways to introduce the lag. We will be talking about them next week.
In the meantime, anything you can select can be attached to a path, including other paths, and anything you can select can be tracked. (We'll be going into tracking in depth next week, too.)
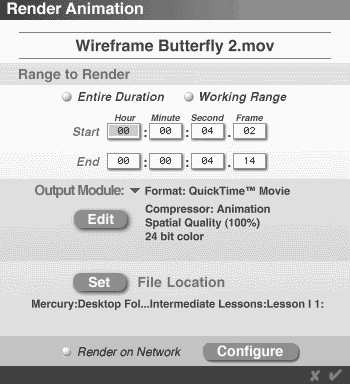 When you are ready to actually render your animation, make sure you are at Frame Zero. (The render will begin from whatever frame you are currently looking at, unless you remember to change it. If you start rendering somewhere in the middle, and request all the frames, Bryce will render to the end, and then go back to the beginning and catch up to where you were when you started. Which can make for a very odd movie. It's lots easier to just start the render from the correct place on the timeline.)
Go to File > Render Animation. (Or type Option-Shift-R on a Mac, or Alt-Shift-R on a PC; or hit the preview Play button when a render is showing.) A dialog will appear that will allow you to choose how much you want to render, the format and destination of the file, and so on. Most of it is pretty self explanatory.
The flippy triangle in the Output Module section will allow you to choose the format you want for your movie. The Edit button there will allow you to change the compression settings and so on. For best quality, tell the computer to render 1 keyframe for every frame. Otherwise, it will only check the actual colors and things every so many frames, and it might miss something you think is important. Of course, that will also increase the file size; so once again, it's a tradeoff. As always, decide which one is most important for the specific job you are doing.
Set in the File Location section will open a browser that allows you to choose the name and location where you want the finished movie to be saved.
If you have multiple computers, you can also use a network to render. Let me know if you need that information.
 |
 |
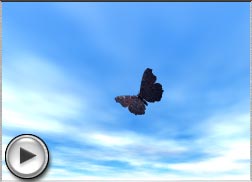
| Rendered Movie | Wireframe Movie |
If you want to make a wireframe animation, just hold down the shift key when you are clicking the checkmark to close the window. You can make some pretty interesting stuff by using various paper colors, or by using interesting color families in wireframe renders. (Unfortunately, those are both states, and cannot themselves be animated.) You can also get an interesting effect by rendering in wireframe and in normal render, and then compositing the two with fades etc. in a graphics or video program.
You will probably need to make more than one render before everything actually works just the way you want it to. For this reason, you may want to change the Render Resolution in the Document Setup, and render at half or quarter size until you are pretty sure you've "got it."
If you are rendering to Quicktime, as soon as the render is finished, the Quicktime window will open, and you will be able to see it. At that point, you can decide if it's time to tweak some more, or if you want to render at a larger size and keep this one.
 |
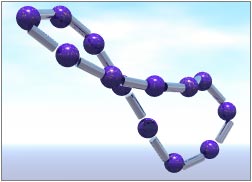 |
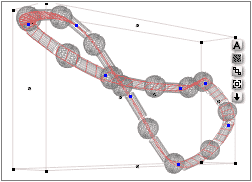
| Using a Path to string a necklace. | And the resulting render. |
Now, some of you may not be planning to ever do animation, and may be thinking, "This is all very well and good, but it's never going to mean anything to me."
I suggest that you think about the things you can do with stuff designed for animation. The trick with parenting can do wonders for posing and arranging objects. No more grouping and ungrouping to tweak things. Just set up Parent/Child relationships and go. Remember, you can set them to inherit size differences, and so on, or not. So, if you want things to move together, but think you might need to tweak the size or angle of some of them, this makes it easy.
Paths are wonderful if you need a number of things arranged in a line. To make a necklace, for instance, manipulate a sphere to make a Trajectory about the shape that you think you are going to want. Make the Trajectory a circle by using that choice in the Objects Attributes box. Create a path from the trajectory, and delete the sphere.
Take whatever you are using for the bits on the necklace, and attach them to the path by drawing a line from their Link icon to the exact position on the path you would like them to be on. If you want to align them, go ahead and do that.
If you are putting a number of the same things on the path, such as the links in a chain, or spherical beads in a necklace, I've found that the easiest way to do it is to multi-replicate about the number that you think you are going to need. They will space themselves around the path in a fashion I cannot fathom. If there is a way to do the math so that they will come out perfectly, I can't figure it out.
But it's easy enough to drag them around by hand, and put them exactly where you want them. So make enough that you won't have to be constantly duplicating, and just drag them into place.
It took about five minutes to make this lapis and silver necklace. It would have taken much, much longer to arrange the beads using any other method. And the best part is, it can easily be resized or reconfigured. It took only a couple of minutes more to make it look like it was being carelessly tossed aside. I don't even want to think about how long it would have taken to change from one pattern to the other without paths.
If you think about it, I'm sure that you can come up with many more applications for still images; plants, strings of bubbles or sparkles, chains, drops of water. Anything that has a number of parts that line up with each other can be made easily using paths.