Note: I haven't used Bryce in years; so these tutorials are archived "as is." I can't accept questions, because I don't remember the answers.
This is page 2. If you haven't finished page 4, please do so before starting this page.
 Okay. The last palette is the Sky and Fog Palette. And that is complex enough that we aren't going into it now at all. That's a whole lesson by itself. (Lesson 4, as a matter of fact.) For now, just remember where it is.
I promised you at the beginning that you would be making pictures before we finished this lesson. It's finally time to do that, now that you know your way around all the palettes and things.
So, if you really like what you have right now, save it, and open a new document. Otherwise, clear away everything in the scene. (Command/Ctrl-A to select it all, and delete to make it all vanish.)
Go to the Create palette, and create an Infinite Ground Plane. (That's clicking on the brown square, third from the left, remember?)
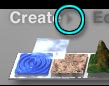
Now, remember the Preset Materials? Well, there are Preset Objects, too, under the flippy triangle next to the word Create on that palette. Click on it now.
 Choose a mountain. (I like Big Sur, myself.) Just click on the icon for the one you want, and then click the checkmark to close the box and use the preset.
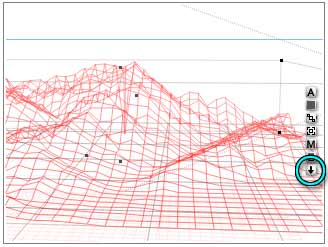
Land the mountain by clicking the down arrow in the Icon Column that appears when an object is selected.
Click on the triangle next to the Edit Palette title to get the Materials Presets. Choose a nice terrain preset. Use what you have learned about viewing the preview to make sure you are picking one that will look good on the mountain you've chosen.
Remember the name, and click the checkmark to close the presets. Select that ground plane. Choose the same preset material for it, so they will blend seamlessly.
Do a quick test render, to make sure it looks as good as you think it will.
 Create a tree, to give you some foreground interest. The defaults will be good enough for now.
To position it where you want it, make sure that you are looking at the mountain from the Camera View. (Remember that you can change Camera to Director from the second flippy triangle on the left of the workspace if you aren't.)
Change the Nano-Preview to Camera view, using the flippy triangle below it. This will ensure that the render there shows the actual composition, even if you are using one of the Orthogonal views.
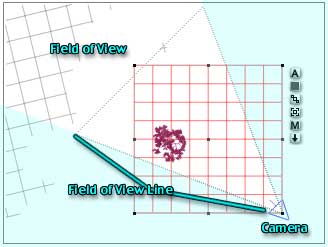
Move to the Top view, and put the tree into the viewing angle. You will see it as a triangle projecting from the blue Camera shape. Something like this. That's the camera Field of View. If you project those lines to infinity, anything inside them will be visible, anything outside them won't be.
 Now, change to one of the other orthogonal views (not the bottom) and pull the tree down to the correct position on the ground. Keep an eye on the Nano-Preview, to make sure it's where you would like it to be. Remember, you can pull it down as far as you like. If the whole trunk is underground, it will just look like a bush. Or maybe several bushes!
Resize it, so it's not as big as the mountain. Move it around interactively, or by using the Reposition Tool on the Edit Palette. Rotate it, too, if you'd like. Feel free to switch from view to view to get it where you want it. Keep tweaking it until it looks good to you.
 |
Preset Landscape;
Mountain - Big Sur Terrain Material - Verdant Hills Sky Preset - Sky 7 Tree - Random Default |
Go back to the Camera View, and do a quick test render.
Add more trees if you like, and position them the same way.
Finally, let's choose a different sky.
There is (surprise!) a flippy triangle next to the Sky & Fog Palette title, too. If you click on it, you will see the preset skies that ship with Bryce. There isn't a way to preview them in your scene, though, so you should probably save your work before you start playing with strange skies. (And some of these are pretty strange.)
To use one, just click on the icon, and then on the check mark to see it in the scene.
When you like what you have in the Nano-Preview, go ahead and render.
Remember, you can do a quick test render for position, etc. by clicking on the buttons to the left of the Render button to turn off textures, and do a Fast Render. To make it even faster, click the bottom flippy triangle, next to the Rendering Controls, and choose Quality > Default (no AA) to turn off anti-aliasing.
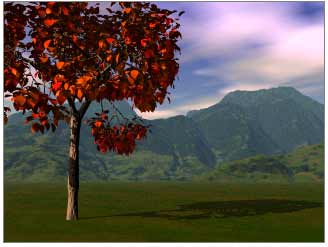
 Also, remember that you can change the size and rotation of the mountain, too, and move it back in the scene to get more aerial perspective. A hint about mountains; the larger and farther back they are, the more realistic they will appear. Don't worry, you won't run out of room. This is the Top view of the Render above. Note the size of the mountain, compared to the ground plane, camera, and tree. Those are all the same size as ever. Did I mention that mountains should be big?
Don't forget to save often while you work.
You can add a Cloud plane, and adjust it so the tips of your mountains disappear into the clouds.
You can add a water plane, to give it a nice reflection, or some rocks.
You can add another terrain in the foreground, and flatten using the Resize Tool it so it makes a nice bank for this side of the water.
Have fun! That's what Bryce does best.
 Just to get you all started, here is my first Bryce image, made in Bryce one, (which didn't have trees or half the stuff Bryce 5 has,) on January 18, 1995. Trust me, when I made it, I didn't know nearly as much about the program as you do now.