Note: I haven't used Bryce in years; so these tutorials are archived "as is." I can't accept questions, because I don't remember the answers.
| Component 1 | ||
 |
 |
 |
| Color | Alpha | Bump |
| Component 2 | ||
 |
 |
 |
| Color | Alpha | Bump |
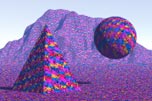
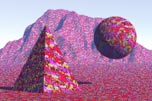
This page is a detailed examination of the 19 blending modes available in the Bryce DTE. When you are finished looking at them, you can return to Page 3 if you were in the middle of it.
As explained in the main lesson, blending is very position dependent. If things don't look the way you want them to, try changing the order of the components. (Unfortunately, if you are using three components, that means that you will have to write down the stats and manually make the texture again. There is no Copy/Paste in the DTE. If you are using two, though, you can use the third one as a holding area to shuffle them around.)
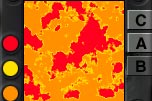
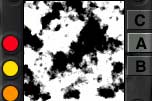
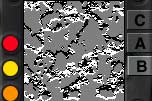
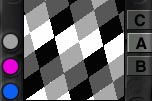
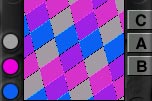
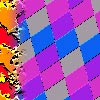
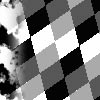
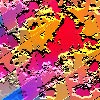
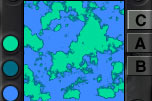
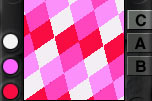
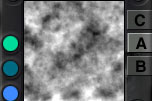
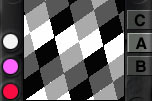
For these examples, I am using two Components (naturally.) If you would like to reproduce these, so you can follow along, Component 1 is using the Basic Red Fractal installed preset, with the middle color swatch changed to H=37, L=127, S=255 and the bottom color swatch changed to H=24, L=127, S=255.
Component 2 is using Square noise, 1 Octave, Standard Mode, 2D. The direction XY =-66, and YZ =-51. The frequencies are: X=129, Y=73, Z=72. The color in the top swatch is H=0, L=161, S=0. The color in the second swatch is H=215, L=118, S=255. The color in the bottom swatch is H=154, L=126, S=232.
If you would like to do your experiments with completely different components, that might be even more useful. After all, you can already see what these do!
As always, this page is really intended as a reference. I don't expect you to memorize all of this, although I'm sure that as you use it you will naturally remember more and more of it.
Alright! Let's take a look at those blending modes.
| Parallel | ||||
 |
 |
 |
 |
 |
| Component 1 | Component 2 | Combination | Combination Alpha | Render |
First there is Parallel. This doesn't blend at all. It's what you want when you are taking different channels (color, alpha, and bump) from different components, and don't want them to mess each other up.
It looks at the first component, and any channels that are used are passed unaltered to the combination. If there are channels that are not used in the first component, they are taken from the second. I went over this one in the main lesson, too, because it can be so very puzzling if you don't know what is going on.
| Combine | ||||
 |
|
 |
|
 |
| Component 1 | Component 2 | Combination | Combination Alpha | Render |
Combine blends colors only. It uses the color in the top swatch of the second component, and replaces it with the colors of the first component. (Not the Alpha, the colors.) Because of this, the color mode makes a big difference with this one. Set the second color swatch in the second component to magenta, and try out the various color blending modes to see what I mean.
Remember, only the color is blended. Alpha and Bump come unaltered from the first component, if they exist there. If they don't, they are taken from the second component.
| Average | ||||
|
|
 |
 |
 |
| Component 1 | Component 2 | Combination | Combination Alpha | Render |
Average blends all of the channels of both components, and weights them evenly. If you want a perfect blending of both of them, Average is what you are looking for.
| Multiply | ||||
|
|
 |
 |
 |
| Component 1 | Component 2 | Combination | Combination Alpha | Render |
Multiply blends them the same way that it would in Photoshop, so that everything gets as dark as possible.
Be careful with this one; you would expect it to simply make two bumps darker, but it actually virtually eliminates the bump in the combination in nearly all cases. (Well, all that I've ever seen.) You can work around it by only having a bump in one, and being careful; but do be careful. (You can test this by turning the bump on and off in the second component.)
| Maximum | ||||
|
|
 |
 |
 |
| Component 1 | Component 2 | Combination | Combination Alpha | Render |
Maximum uses the maximum (lightest) of the values in the two components. If two colors are being combined this way, Bryce will use the color from whichever one has the lightest Alpha for a given pixel. It treats bumps the same way; uses whichever one has the lightest Alpha.
| Minimum | ||||
|
|
 |
 |
 |
| Component 1 | Component 2 | Combination | Combination Alpha | Render |
Minimum is just the opposite; the minimum (darkest) values will be used in the Alpha, and the colors or bumps that correspond to those values will also be used. To check these two out more easily, take a look at just the Alpha, and then the colors. It will be clear just what is going on.
| Add | ||||
|
|
 |
 |
 |
| Component 1 | Component 2 | Combination | Combination Alpha | Render |
Add combines the two components by adding the values of each of the three channels so that they all become lighter.
| Sub | ||||
|
|
 |
 |
 |
| Component 1 | Component 2 | Combination | Combination Alpha | Render |
Sub does the same thing, but it subtracts them, so the result is darker.
| Blend v1 | ||||
|
|
 |
 |
 |
| Component 1 | Component 2 | Combination | Combination Alpha | Render |
Blend v1 uses the alpha channel of the first texture as a mask for blending all three channels. Areas that are black in the alpha of the first component are given the color, bump and alpha of that channel. Areas that are white are given the color, bump and alpha of the second channel. Gray areas are blended according to their value.
| Blend v2 | ||||
|
|
 |
 |
 |
| Component 1 | Component 2 | Combination | Combination Alpha | Render |
Blend v2 does exactly the same thing, but it uses the alpha channel of the second texture as the mask. So areas that are black in the second alpha are given the color, bump and alpha of the first channel. Areas that are white in the alpha of the second channel are given the color, bump, and alpha of the second channel. Areas that are in between are blended according to their value.
| Blend Slope | ||||
|
|
 |
 |
 |
| Component 1 | Component 2 | Combination | Combination Alpha | Render |
Blend Slope puts all three channels of the first component on flat areas, and all three of the second one on areas vertical areas. In between, they are blended according to their angle. Notice that the flat thumbnail conforms to the preview conventions that we have learned; but neither side goes to solid color, since both are full blown components.
You also have no control over the steepness of the slope, of course. If you want to do that, you should use a filter on one component, and choose a blending method that will pass the filtered area unchanged; like Blend v1 or Blend v2, which takes the color and bump from either a black or white alpha intact. It's the same principle we used with the Wet Rock exercise in this week's lesson, but you can employ noise where we had only flat color.
| Blend Altitude | ||||
|
|
 |
 |
 |
| Component 1 | Component 2 | Combination | Combination Alpha | Render |
Blend Altitude does the same thing, but it uses height not slope. All the channels of the first one will appear on the low ground, and all the channels of the second one on the high ground. In between, of course, they blend.
| Blend Orientation | ||||
|
|
 |
 |
 |
| Component 1 | Component 2 | Combination | Combination Alpha | Render |
Blend Orientation does the same thing again, but this time it puts the channels of the first component on the West side of Objects, and those of the second on the East. Like the other Orientation modes in Bryce, it favors the West. Flat surfaces, such as the ground, get the first component. (It's good for moss, or wind driven snow, or things like that which appear on only one side of something.)
| Fast Slope | ||||
|
|
 |
 |
 |
| Component 1 | Component 2 | Combination | Combination Alpha | Render |
Fast slope is exactly like Slope; but the change is much sharper (there is very little blending,) and objects must be much flatter to get any of the first component on them.
| Blend Random | ||||
|
|
 |
 |
 |
| Component 1 | Component 2 | Combination | Combination Alpha | Render |
Blend Random uses a random low frequency noise channel that Bryce generates as an alpha mask, blending the two components according to that channel. Remember, low frequency means Large Areas. This is good for scattered flowers and things of that nature.
| Blend Min | ||||
|
|
 |
 |
 |
| Component 1 | Component 2 | Combination | Combination Alpha | Render |
Blend Min does exactly what Minimum does; it looks for the darkest alpha, uses that, and then uses the bump and color from the component that won that bit of Alpha. The only difference is that it blends the two where the values are close.
There is very little difference visible between Minimum and Blend Min with these particular components, since I purposely chose things with high contrast Alpha channels to show the other blending modes very clearly.
| Minimum and Blend Min Compared | |||
 |
 |
 |
 |
| Component 1 | Component 2 | Minimum | Blend Minimum |
Because of that, I'm providing a second example that shows the difference between the two quite easily. The Color Mode for both of these components is Linear Interpol3, so they look like colorized versions of the alpha.
As you can see, there is no wiggle room for the color in Minimum; it is either from Component 1 or from Component 2. In Blend Min, however, the two blend nicely into each other. Which you use, of course, depends on what you want. Minimum would make a good planet. Blend Min would make a nice cloud.
| Blend Max | ||||
|
|
 |
 |
 |
| Component 1 | Component 2 | Combination | Combination Alpha | Render |
Blend Max is exactly like Maximum, using the lightest part of the combined alpha to determine the color and bump, except that it blends the result, like Blend Min.
| Maximum and Blend Max Compared | |||
|
|
 |
 |
| Component 1 | Component 2 | Maximum | Blend Maximum |
Once again, since there is little difference in the first examples, I'm giving you a second set, so you can see what it's like when the Alpha channels have parts that are closer in value.
| Proc Blend | ||||
|
|
 |
 |
 |
| Component 1 | Component 2 | Combination | Combination Alpha | Render |
Proc Blend is a procedural blend that modifies the colors of the first component according to the grayscale value of the colors (not the alpha, no matter what the manual says, the colors) in the first one. Each pixel is examined, and if the color in Component 2 is light, the color of the corresponding pixel in Component 1 is lightened. Where the color in Component 2 is dark, the corresponding pixel in Component 1 is darkened. When the comparison is over, the new colors of Component 1 are averaged with the colors of Component 2, and appear to be weighted towards the colors of Component 1; so you essentially have blended colors, with extra weight on the values of Component 2 and the colors of Component 1.
The end result, normally, is color that is more saturated than what you started with.
It does the same thing with the other two channels; comparing them and increasing or decreasing the values for the first one according to the values in the second before blending them.
You may need to adjust your component colors to get what you want in the combination for this one. Because it is using the values of the colors, your color blending mode makes a world of difference here.
| Proc Blend | ||
 |
 |
 |
| Component 1 | Component 2 | Combination |
I realize, it's difficult to see with the example above; so I'm providing another two. The first is the same components as I used for this entire exercise; only the colors have been changed. Notice that the top color swatch in the second component, which corresponds to black in the Alpha channel, is white here. Notice, as well, that in the combination those areas that have white lozenges in Component 2 have been made lighter, in spite of the fact that the Alpha is darker there. The blend is made according to the values in the Color channel, not the Alpha channel.
(Bump was turned off, so you could see the colors more clearly.)
| Proc Blend | ||
 |
 |
 |
| Component 1 | Component 2 | Combination |
In this second example, I have reduced the contrast in Component 1 (I changed the values of a and b in the filter that was used) so that you could see the effect of Proc Blend on the Alpha channel.
Notice that in this case the Alpha values are used, not the color values.
| Difference | ||||
|
|
 |
 |
 |
| Component 1 | Component 2 | Combination | Combination Alpha | Render |
Difference works the same way here it does in Photoshop, in all the channels that both components posses. (Any channel that is enabled in only one is passed on unchanged.)
Essentially, Bryce finds the difference between the two, and that is what it displays. In other words, for each color pixel, it finds the value for Red, for Green and for Blue in each component, subtracts the smaller number from the larger in all cases, and displays the result as a new RGB color.
It does the same thing for the alpha and bump, finding the difference between the two of them, and using that as the new value.
And that's really all there is to know about the theory of Component Blending. As always, I don't expect you to memorize this all at once or anything. But, as you use it, you will know without thinking what you want to use where. In the meantime, you have this page as reference. I suggest you print it out so you can refer to it easily while building your textures.
If you came here from the middle of the lesson, you can go back to Page 3 now.