Note: I haven't used Bryce in years; so these tutorials are archived "as is." I can't accept questions, because I don't remember the answers.
This is page 2. If you haven't finished page 1, please do so before starting this page.
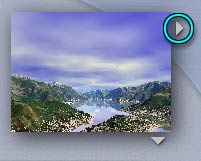 To the right of the preview is a flippy triangle that brings up the Sky presets, which you are already familiar with.
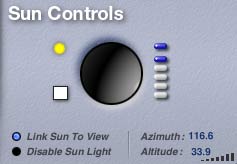 Below the preview are the Sun Controls. Here you see the same Sun Position Dome that you have used before. It works exactly the same way, although now you can see the numerical values for the altitude and azimuth you are using; and you can set them by clicking on the numbers and typing a value in. (Altitude, of course, is degrees above the horizon. Azimuth is degrees around the circle formed by the base of the dome, with 0° at 12 o'clock, 90° at three, 180° at six, and so on.)
The Sun/Moon toggle, Sun Color, and sky memory dots are all here, and all work exactly the same way as well.
But now you see a couple of extra buttons. The first one is Link Sun to View. When it's checked, the dome works the way you have learned. When it's not checked, the position of the sun is independent of the position of the camera you are using. So the far side may, or may not, be the horizon in front of you.
When the sun is not linked to the view, the dome acts like a compass. The right side puts the sun in the east, the top in the north, and so on. Where the camera is, of course, depends on how you have moved it. To get your bearings, you can look at the scene from the Top view. There, too, the compass directions are set the way you would expect, with the North at the top.
When you get to the point where you are animating, you will want to make sure that the sun is not linked to the view, if you want to have realistic animations.
You can also disable the sunlight from here, which can give you some interesting effects, and which you will want if you are lighting a scene entirely with other lights. Try it out.
The Preview and Sun Controls are independent of the tabs, so they are always available.
 We are going to start with the Atmosphere tab, so that you can see the stars when we get there. Click on the title of the tab now, to open it.
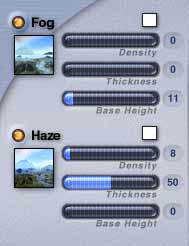
As you can see, there are controls here for fog and haze again. But this time, there are more of them, and you can set them more accurately. For instance, you can set Haze Base Height, which you cannot do from the Sky & Fog palette. Click the button next to the title to enable or disable the atmospheric effect altogether. The buttons on these are all amber when the control is enabled, and the thumbnails are in color. Anything gray is disabled.
Click on the number next to each slider to type in whatever value you want to use. The color swatches work just as they always do.
There are three new controls, though.
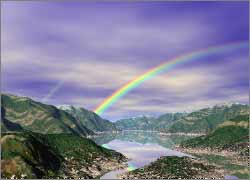
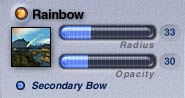 The first is the Rainbow. Click to enable it. Now, just as in the real world, you can only see a Brycian rainbow if the sun is behind you. In Bryce, it has to be pretty low on the horizon, too. Make sure Link Sun to View is enabled, turn the rainbow opacity up so you can see it easily, and drag the sun to the horizon at the bottom. See it? You can adjust the opacity, just as you would expect. The Secondary Bow is always much fainter than the primary bow.
 |
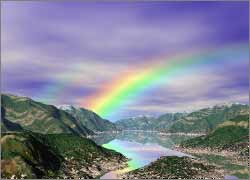 |
| Rainbow Radius 15 | Rainbow Radius 89 |
The radius adjusts the thickness, not the apparent size of the bow, like this. (The opacity setting was 79 in both cases.)
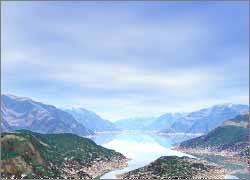
 Blend With Sun allows you to blend the color of the haze or fog with the color of the sun. This is most noticeable when the sun is low on the horizon. You can click the buttons below the sliders to enable blending of either one, and not the other. But the controls to determine the amount of color and luminance that are blended work for both at once. (In other words, you can't blend 50% of the fog color, and 80% of the haze color.)
 |
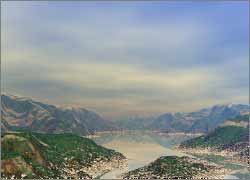 |
| Blend with Sun Disabled | Blend with Sun Enabled |
It's easiest to see if the sun is behind you, and there is a lot of haze. So disable the rainbow, crank up the density and thickness of the haze, and give it a try. Try coloring the sun or haze, or both, as well. (The effect is subtler if they are both at the default white, but it can still easily be seen, as these examples show. Haze density and thickness were both set to 70%.)
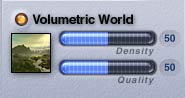 Volumetric World is for super-realistic effects. It will give all your lights volume, make shadows in your fog, and do other amazing things. But it takes for-freaking-ever to render. Go ahead and try it if you want, but even the preview will take a while. This is the kind of rendering that can go on for days and days, even on a very fast machine. Decreasing the quality speeds it up, but I recommend that you only use it if you really need it, and have plenty of time.
(I would show you an example; but I'm afraid that I don't have that kind of time.) Be aware that this will also make your world much brighter; so you will probably have to compensate for it.)
![]() Color perspective mimics the atmospheric color shift that occurs in the real world because the atmosphere scatters blue light more efficiently than green or red. (Red, blue, and green are the primary components of light.) This controls the rate at which that scattering occurs, and I strongly recommend that you don't play with it if you want to keep a degree of realism in your scenes. (However, you can always reset the sky if you don't like the result, so if you feel like it, go ahead. But the results can be unpredictable.)
Color perspective mimics the atmospheric color shift that occurs in the real world because the atmosphere scatters blue light more efficiently than green or red. (Red, blue, and green are the primary components of light.) This controls the rate at which that scattering occurs, and I strongly recommend that you don't play with it if you want to keep a degree of realism in your scenes. (However, you can always reset the sky if you don't like the result, so if you feel like it, go ahead. But the results can be unpredictable.)
 The next tab has the Cloud Cover controls.
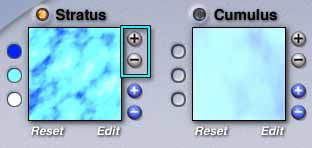
As you can see, you can click to enable or disable both Stratus (high wispy) and Cumulus (lower, thicker) clouds.
Each control also has a thumbnail. These show the actual procedural textures that Bryce is using to generate the clouds. You can change the turbulence of your clouds by clicking on the gray buttons, to the upper right of each thumbnail. The plus sign increases the turbulence, of course, and the minus sign decreases it. Try it out.
In the Screen Shot, Cumulus is disabled. Click to enable it, and try it, too. The combination can be very interesting.
These settings |
 |
Give you this sky. |
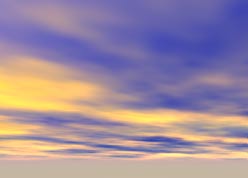 |
Make sure the Cumulus is enabled, and click on Stratus to disable it. Now, leave the Sky lab, and go back to the Sky & Fog palette. Try changing the colors of the clouds using the Cloud Color swatch now. (It's the thumbnail on the far right, next to the Frequency/Amplitude Graph.) Quite a difference, huh?
The effect is easier to see if you have the haze and fog set to something other than white, by the way.
When you have played enough here, go back into the Sky Lab, and we'll take up where we left off.
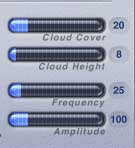
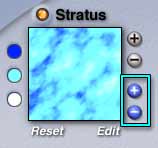 Looking at the two thumbnails in the Cloud Cover tab, once more. The blue buttons adjust the complexity of your clouds, adding or deleting detail.
If you want to return to the settings that were here, you can click Reset. Clicking Edit will take you to the Deep Texture Editor. You can do this if you want to; but explaining how it works is beyond the scope of this class. (I'll give you just a hint, but please finish the work for this week first. You can get some spectacular results by adding filters. Click "Filter" at the bottom of the Deep Texture Editor, and then "None" on the palette that appears. Choose one from the popup, and see what happens.)
Changing the colors probably won't have a discernible effect, but you can do it if you want to try it out.
 Cloud motion is for animation, so we won't go there right now.
The other sliders you are already familiar with. These controls simply allow you to set them precisely.
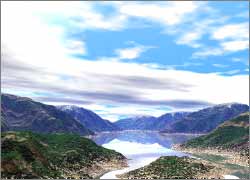
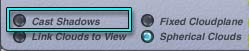 At the bottom, you can choose to enable or disable shadows cast by clouds. Be careful with this one, because if the cloud cover is too dense, it can cast your entire scene into shadow. If you want to see the effect more clearly, you can switch to the Render Against Neutral preview, and View Ground Plane.
 |
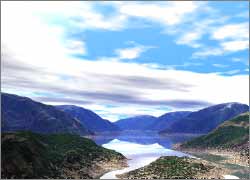 |
| Cloud Cast Shadows Disabled | Cloud Cast Shadows Enabled |
Used judiciously, this can give you some wonderfully realistic effects.
![]() Link Clouds to View allows you to move your camera without changing the pattern of the clouds in the sky. You might want this if you have a perfect cloud setup, but it's most often used in animation, to prevent the clouds moving by quickly as the camera moves.
Link Clouds to View allows you to move your camera without changing the pattern of the clouds in the sky. You might want this if you have a perfect cloud setup, but it's most often used in animation, to prevent the clouds moving by quickly as the camera moves.
Fixed Cloud plane is for much the same thing; it prevents you from getting too close to the clouds as you move higher in the sky.
Both give the illusion that the Bryce clouds are much higher, and farther away, than they actually are, allowing your scenes to mimic the real world.
![]() Spherical clouds gives you the lovely, puffy clouds that we are used to seeing in the lower altitudes. Disabling them gives you flat clouds, such as you might see in the high desert of the Western US. (This is the only kind that the first version of Bryce, which is named for Bryce Canyon, had. I thought they just weren't very realistic. Imagine my surprise when I visited Arizona the first time, and saw clouds just like that in the sky.)
Spherical clouds gives you the lovely, puffy clouds that we are used to seeing in the lower altitudes. Disabling them gives you flat clouds, such as you might see in the high desert of the Western US. (This is the only kind that the first version of Bryce, which is named for Bryce Canyon, had. I thought they just weren't very realistic. Imagine my surprise when I visited Arizona the first time, and saw clouds just like that in the sky.)
 |
 |
| Spherical Clouds Enabled | Spherical Clouds Disabled |
In these two examples, the settings are identical, except for enabling or disabling Spherical Clouds. (Also notice that this is the same sky used in Cloud Shadows above, with the complexity and turbulence tweaked using the blue and gray buttons.)
 Which brings us to the Sun & Moon palette.
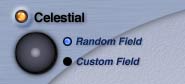
First is the Celestial control. This allows you to put stars and comets in your scenes. Click to enable it. You can choose to generate a random star field, or you can use the Custom field, which are the stars you can see from Earth.
The position dome works just like the one for the Sun/Moon. If you are using the Custom field, the top shows the stars from the Northern hemisphere, the bottom the ones from the South.
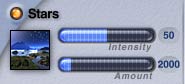 You need to enable Stars to see them, of course. You can control the Intensity and Amount of visible stars. (Increasing the Amount doesn't actually generate more stars, it just makes more of them visible, as if the sky was clearer.)
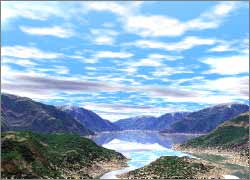
In order to really see them, I recommend that you disable all the cloud and atmosphere effects. (Stratus, Cumulus, Fog, and Haze.) Also disable Sun/Moon visible. And, naturally, you have to toggle to the Moon in the Sun Control. You can't see stars during the day.
 |
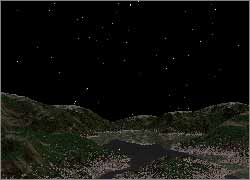 |
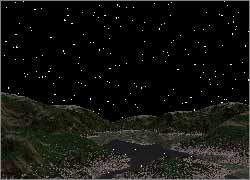
| Random Star Field | Custom Star Field |
The Random field is more easily seen in the preview, because it seems to contain more stars. You might not be able to see the Custom stars in the preview at all; but if you do a quick test render, they are there, and extremely realistic. (These two examples show the same settings. They are also not anti-aliased, since that removed all hint of stars from the custom field at this render size.)
If, when you render, you don't like the random star field you've generated, you can generate another by Option/Alt clicking the Random Field button. This will change the position of your comets, too, because they are generated with the star field.
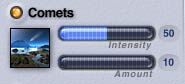 You can add comets to your scene, if you are using the Random field and Celestial is enabled. (I couldn't find any in the Custom field; I'm betting I wasn't checking the proper orbit. Nah. They really aren't available there.) The sliders control the intensity and number of comets visible.
 |
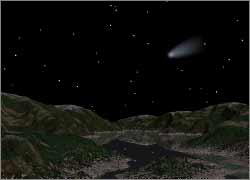 |
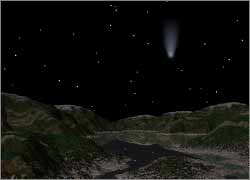
| Comet - Sun Azimuth 0° | Comet - Sun Azimuth 270° |
The direction of the tail is controlled by the azimuth of the sun. It always points away from it. Add a few comets, and move the moon around the Sun Position Dome, to get a feeling for this. (Remember, the sun is on the opposite side of the Sun Dome from the moon. So moving the moon moves the sun, too. Keep an eye on the numbers.)
You can place the comet where you want it in your sky by moving the Celestial dome, just the way you can place the sun by moving the Sun Dome.
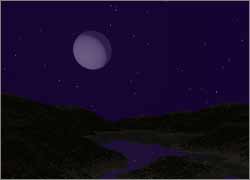
 Enable Sun/Moon visible, if it's disabled, toggle to the moon, if you are looking at the sun, and place it low on the horizon so you can see it if it's not already there. Turn the Disk Intensity all the way up.
Now, enable the Moon Phase. You can change the phase of the moon by clicking and dragging on the circle as if it were a trackball. What you see is what you get. So you can put the crescent wherever you want it, change the phase, and pretty much have a lot of control over the shape.
The first slider, Earthshine, will determine how much reflected light from the earth is landing on the moon. The higher it is, the more you will be able to see the "dark" side of the moon. Try it out.
Softness determines how hard the shadow on the moon is. The higher the value, the softer the line of demarcation.
 |
 |
| Moon Image Disabled | Moon Image Enabled |
Finally, you can click to put a map of our own moon on the surface of the Bryce moon. I find it impossible to get a bright full moon this way, though. So if that is what you want, I suggest that you use a picture object. We will be covering them before the course is over.
We'll take a closer look at the rest of these controls on Page 3