Tutorials for Photoshop,
Paint Shop Pro, Blender, and More!
This is the second page of a 2 page tutorial. Click here to start with the first page.
If I wanted a white shirt, (with an add for this web site on the back,) I'd be done now. But let's say, for this example, that I want a burgundy shirt.
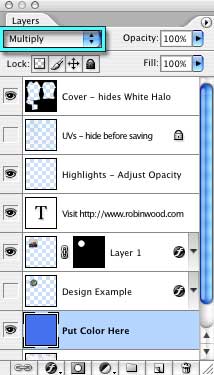
Begin by making the Put Color Here layer visible. (Click the well where the eye should be, to toggle the visibility of the layer.)
Instantly, the shirt floods with a deep blue violet color. This is because the layer is filled with that color, and the Blending Mode is set to Multiply.
Multiply literally multiplies the color in the layer by the color of the pixel directly below it. It will give you a color that is as dark, or darker than, the color in the layer. If the color below is black, then it will give you black. If the color below is white, then the color in the layer isn't changed. If the color in the layer is yellow, and the color below it is cyan, you'll get green.
It's like laying a piece of colored acetate on the stack. The big difference between this, and using 50% opacity, is that all the colors remain opaque, so they are all bright and true.
Since the layer on the bottom of the stack, (Texture,) has the shadows of the wrinkles and folds on it, but is otherwise white, using Multiply gives us a color that exactly matches the color in the color layer, but with the shadows.
You can try out some of the other blending modes, by choosing them from the drop down menu here. (Or you can toggle through them quickly by using the + on your keyboard. (Not your numeric keypad. Which, yes, means you have to hold down the Shift key.)

I'm going to leave the Blending Mode at Multiply, and change the color of that layer. To do that, click on the Foreground Color swatch in the Toolbox.
That will open the Color Picker for your system, or the Adobe Color Picker, depending on how you have your preferences set up. Choose the color you want for your shirt.

Once you've chosen the color, you need to fill the Put Color Here layer. You can do that either by clicking on it with the Paint Bucket tool, or simply holding down the Alt/Option key, and tapping Delete/backspace.
The shirt will take on whatever color you have chosen.
That looks good, but the highlights are a little dim, on the darker shirt. Let's brighten them up a bit.
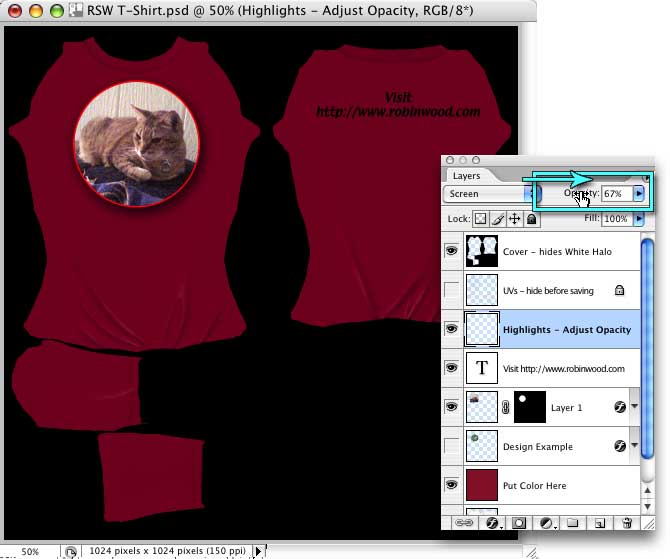
If you click on the Highlight layer, you'll notice that the Blending mode is Screen.
Screen is like multiply, but it works in reverse. It multiplies the inverse of the two colors, so the color is always the same or lighter. When you use Screen, any pixels that are black in the layer are unchanged in the layers below. Any that are white look white. If the layer color is yellow, and the color below is cyan, it will look white unless you decrease the opacity of the layer color; then you get cyan with a very slight greenish tinge.
It's something like projecting two slides on top of each other; they get washed out very quickly; which is why Screen is usually used at less than full opacity.
So, to get brighter highlights, just increase the opacity of this layer. (Click on the word Opacity, and drag to the right, or type in a slightly higher number.)
Be careful and subtle here. If you make them too bright, they can look like chalk in Second Life. You want just enough that the folds and wrinkles look natural. I'm going with 67% for this color.
If your color is very light, you might want to decrease the opacity of this layer.
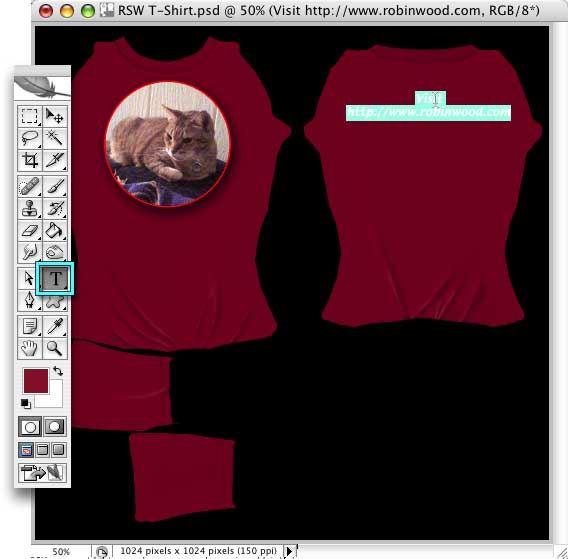
Okay, let's change the text on the back. (Unless you want to walk around advertising my web site, that is. :D )
We could just hide this layer, too, but I'm going to make it say "The Cat's Meow" instead. Tap T to get the Text tool, (or click on the T icon in the toolbar to choose it,) put your cursor on the words, and click five times to select all of them. Now just start to type. Whatever you type will replace the words I had there.
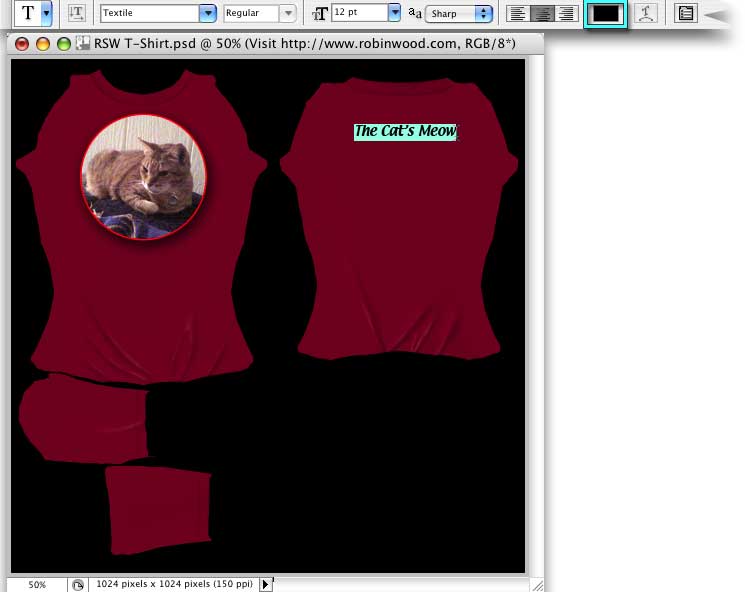
You can also change the font, font size, or color, using the Options bar at the top of the window. (Earlier versions of Photoshop have these options in a palette.) I'm going to change the color, shown here as black, to white. To do that, just double click on the color swatch, and choose a new one from the Picker. Any highlighted text will change to that color.
You can also highlight text and change any other attribute, but that's beyond the scope of this tutorial. (Besides, you can probably figure it out for yourself. :D )
Okay! The design is done, and we're ready to prep the finished texture for uploading to Second Life.
The first thing we need to do is resize the image. Working at 1024x1024 is recommended, but it's best to up load clothing no larger than 512x512, since SL is going to resize it to that when you make it a shirt, anyway, and your graphics program will do a better job than SL.
But we also want to keep a copy of the layered file, because it's much easier to tweak later on.
So I'm going to teach you a trick that works only in Photoshop. (If you're using a different graphics program, you can Save your layered file, and then Save As with a different name, instead.)
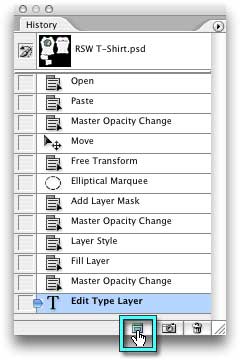
Look at the History Palette. (If you can't see it, get it from the Windows menu.) At the bottom, there are three buttons. Click the left-most one, and you'll create a new document, from the current document state.
Do that now.
Make sure the new document is selected, (it will be named for the last thing you've done. In my case, that's Edit Type Layer.)
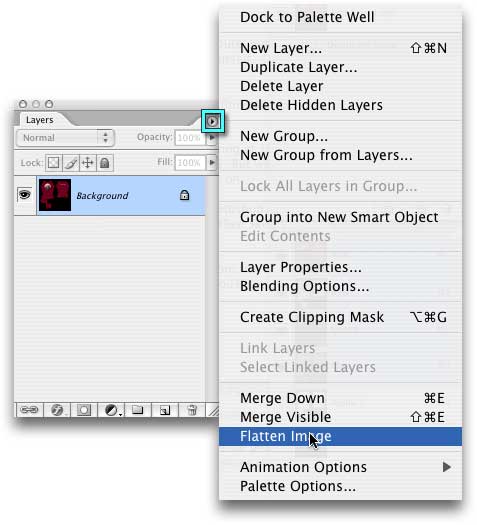
Look at the top right corner of the Layers palette. You'll find a flippy triangle there. If you click it, you'll get a whole menu of stuff. (You can get the same menu by right-clicking most place in the palette.)
Choose Flatten Image from that palette, to keep everything looking exactly like you see it here when you Resize and Save.
This step isn't necessary, since you can choose to Scale Styles when you resize, and it's not recommended unless you are working on a copy of your file (like we are here.) But it does make the resizing go more quickly, especially with large files.
The picture, by the way, shows what the Layer palette looks like after you've flattened the file.
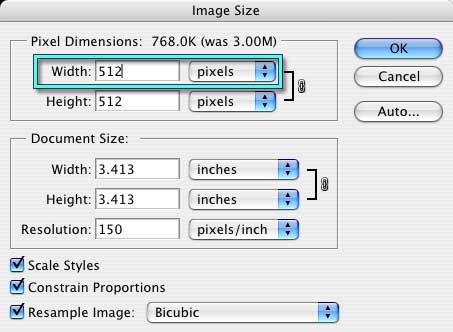
Once you've done that, go to the Menu, to Image > Image Size. That will open the Image Size dialog.
Change the size in pixels in the Width and Height fields to 512. (You probably only have to change one of them, since they should be locked. If they aren't, enable Constrain Proportions at the bottom of the dialog.)
Someone has asked me about the resolution of this T-shirt, which is set to 150 pixels/inch. It's that way because I was doing some other things, and didn't reset it. (If I'd noticed it, I would have set it to 72dpi to prevent confusion, but I'm afraid that I didn't.)
Resolution is only important if you are going to be printing the image, which we aren't. For our purposes, uploading to Second Life, it doesn't matter one iota what that resolution is. (An image that's 512x512 pixels will be 3.412" x 3.412" at 150 pixels per inch, and 7.111" x 7.111" at 72 pixels per inch, but it's the same 512x512 pixels.)
The only important numbers in this dialog are in that top portion, where it lists the dimensions in Pixels. As long as that says 512, we're golden.
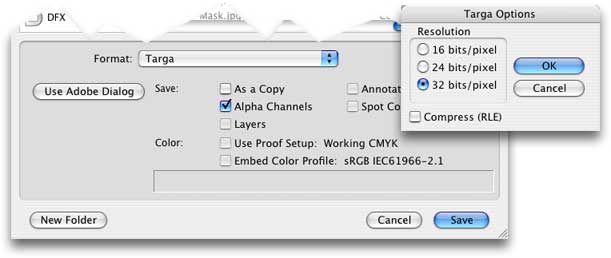
All that's left now to do is save and upload! So, Save As (File > Save As,) and choose Targa from the drop down list. Once you hit the Save button, another little dialog will open, that allows you to choose the bit depth.
Choose 32 bits/pixel from the menu. (8 each for the Red, Blue, and Green channels, and 8 for the Alpha channel, which we didn't discuss, but which is there.)
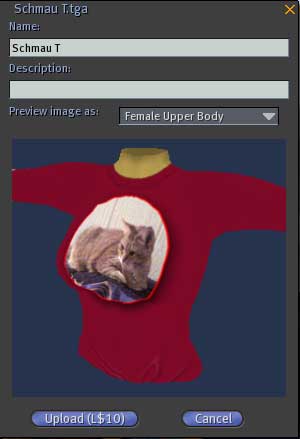
Open Second Life, and choose File > Upload Image (L$10) from the menu. Browse to the image, and choose it.
This will open a dialog that will allow you to Preview the image on a figure before you open it. Choose the Male or Female upper body, and take a look. The "skin" of the mannequin in this window is a peculiar mustard yellow color (probably chosen because it's obvious, and no one is likely to make a garment quite that color.) You'll see it poking out the neck and both arms; but that's all as it should be. It's not some weird color that's appeared on your shirt.
The normal SL Camera tools work in this window, too; so you can drag up or down to zoom in or out, hold down the Option/alt key and drag to move around the mannequin, hold down Control/Option or ctrl/alt and drag to look at the mannequin as if it were the center of a virtual trackball, or Control/ctrl Shift and drag to pan the image right, left, up or down.
If it doesn't look like you wanted it to, take careful note of what needs to be changed, and cancel out of this dialog.
If it does, then go ahead and click the Upload button, and pay your L$10.
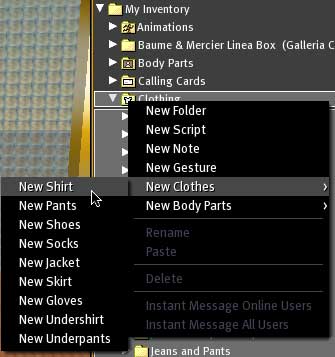
You are ready to make your shirt. Open your Inventory, right click on the Clothing folder, and choose New Clothes > New Shirt from the Menu that opens when you do..
This will put an item called New Shirt in your Clothing folder. Double click on it, to wear it.
Right Click on your Avatar, and choose Appearance from the pie menu.
In the Appearance dialog, choose Shirt. (I'm assuming that you are familiar with all of this from your Orientation, if nothing else.)
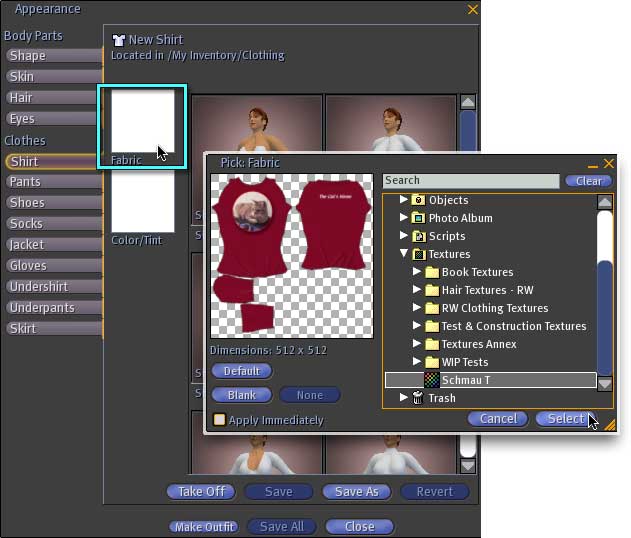
In the Shirt section, click on the swatch on the top, that says Fabric. This will open the Pick Fabric dialog. Choose the texture you just uploaded from your Texture folder. (The contents of your folder will differ from the contents of mine, of course.)
Click to Select the Fabric, if you have disabled Apply Immediately (which I recommend, by the way,) and you'll see it on your Avatar in the Appearance window, and also in the World.

From there, just Save As, give it a name, close the Appearances, and enjoy your new shirt! (Wow... that's a really old picture of me. Good thing I'm going to be updating this tutorial soon!)
Now, of course, there's lots more you can do, if you feel so inclined. You can change the placement of the design, or shrink the front placement to a small picture over the left breast, and put a large picture on the back, or put type on both the front and the back, or anything else you like. (I've included a hidden UV layer, to aide in placement, if that's what you'd like to do. The lines on that map correspond to the polygons in the model. Think of it as a wireframe. There will be forthcoming tutorials explaining exactly how to use the UVs, if you find them confusing.)
You can also increase the darkness of the shadows, by duplicating the Texture layer (Select it, and tap Command/ctrl J, or drag it to the New Layer icon at the bottom of the Layers palette.) Change the Blending Mode to Multiply (you know how to do that,) and you'll effectively double the depth of the shadows. If that's too much, use the Opacity slider to make them a little lighter. If it's not enough, duplicate that layer to make them even darker.
If you want to make a Black shirt, by the way, I suggest that you use a dark gray, not black. That way, you will be able to see the shadows.
Experiment with it! Try filling the Color layer with a Pattern instead. (Edit > Fill: Use Pattern, and then pick one from the fly out menu.) Try using different blending modes with the pattern. Change the Opacity, and see if you like that better.
Add another layer, and use Color in one, and a Pattern in the other. Play with the Blending modes and opacity of both of them.
Have fun with it! And if you make a particularly nice shirt, let me know.