Tutorials for Photoshop,
Paint Shop Pro, Blender, and More!
This is the third page of a 3 page tutorial. Click here to go to the first page. Click here to go to the second page.
Okay, if you've done the experiments, you should now have grasped the concept of a Channel. You should understand, at a near-intuitive level, that any pixel that's white in the Channel gets the full 256 levels of - something -. Any pixel that's black gets zero - something -, and any pixels that are a level of gray in the Channel get the amount of - something - that corresponds to that gray level.
This is true whether that - something - is the color Red, the amount of Selection, or (gasp) a level of Opacity.
Does all the stuff you've heard about Alphas start to make more sense now?
Let's make a quick Alpha Channel.
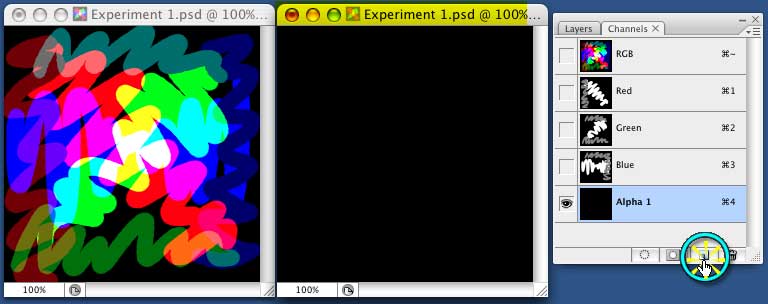
Click on the Right Window, to enable it, and click on the New Channel button at the bottom of the palette, to make a (surprise!) New Channel. Notice that it's automatically filled with black, so that you can draw anywhere on it you like.
Draw a white squiggle. Did you see what happens in the other window, when you finish drawing?
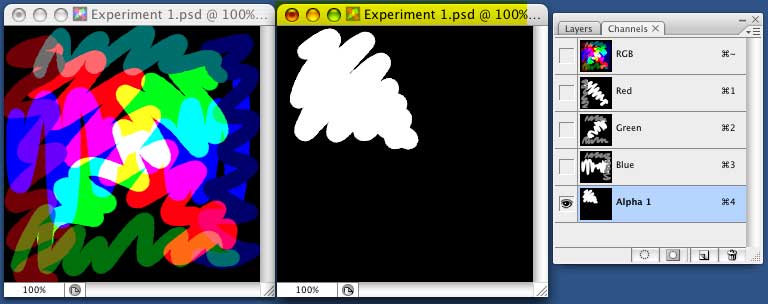
Nothing.
Photoshop doesn't know what this Channel is driving, or even if it's supposed to drive anything at all, so it simply stores the information.
The Color Channels are all pre-assigned to drive Colors, which is why you can see them as you work.
The Alpha channel isn't, which is why you won't see it doing anything in Photoshop. It's still there, and it works exactly the same way, but the - something - is left unassigned, until you assign it.
But that's in Photoshop, where you can have dozens of Alpha Channels, driving Spot Colors, storing selections, or doing tons of other things.
In Second Life (where there can be only one,) the Alpha Channel is pre-assigned to drive Opacity.
It works exactly the same way, of course, because it's still a Channel.
A value of 255 (pure white) in the Alpha gives that pixel an Opacity of 255, so it's totally opaque. A value of 0 (pure black) gives an Opacity of 0, so it's totally transparent. A value of 128 (50% Gray) gives an Opacity of 128, or exactly midway between totally opaque and totally transparent, and so on.
If you click the eyeballs for the RBG and the Alpha channel, you will see your Alpha as an Overlay. In this particular case, it's not very helpful, because the image is an Experimental Mess. But this is the only way you can directly see your Alpha on the Texture in Photoshop.
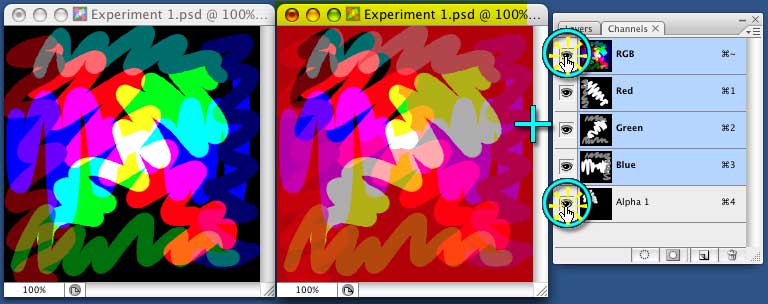
Other than that, the important thing to remember is not to expect to see any transparency from your Alpha when you view it in Photoshop, because you won't.
Now that you understand that, let's Save this image as a 32 bit Targa file, so we can see that Alpha as transparency.
We'll need 32 bits, because each channel in an 8 bit image uses 8 bits of information. Our image is now RBGA, so that's four channels. 8 X 4 = 32, so that's what we'll need.
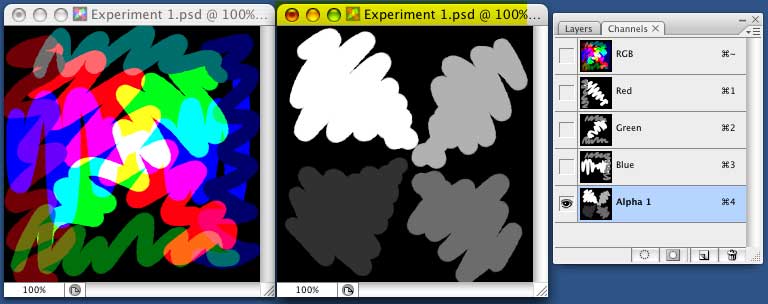
Make sure that, in all your playing around, you've got a document with exactly one Alpha Channel, and that Alpha channel has something on it. It really doesn't matter what. Whatever squiggles you made are fine. But you'll see more if some of that channel is black, some is white, and some bits are various shades of gray.
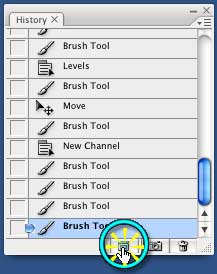
On the History palette, click the Create New Document from Current State Button. (I highly recommend that you get in the habit of doing this, so you'll never accidentally overwrite your Layered files.)
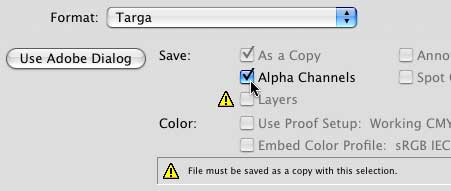
Then go to the File menu, and Save As.
For the Format, choose Targa, and make sure that Alpha Channels is checked. Then click OK.
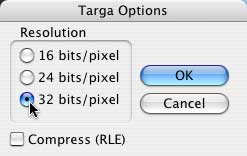
In the next dialog, check "32 bit" and click OK again.
And that's it. You've just made a Texture with an Alpha Channel.
Let's see how it looks.
Boot Second Life, if it's not running, go to the File menu, and choose Upload Image.
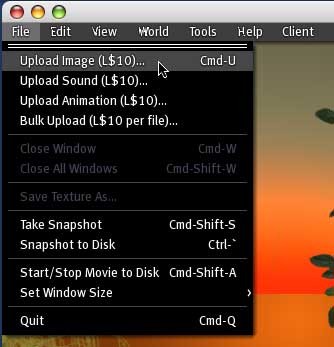
In the dialog that opens, Browse to the image you just saved, and select it.
That will open a Preview, which allows you to see the texture.
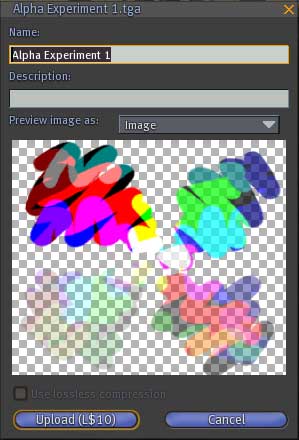
Notice that all the places that you made white in your Alpha are opaque.
All the places that you made black are transparent; you can see the gray and white checkerboard clearly there.
Any areas that you made gray are semi-opaque. The lighter they were, the more opaque they are. You can see the checkerboard through them, but it's colored by the image. (Roll your mouse over the image above to see this.)
If you drag this panel around the screen, you'll see that the checkerboard remains fixed, while the rest of the image moves. Trippy! But it does let you spot areas that aren't quite opaque, fairly easily.
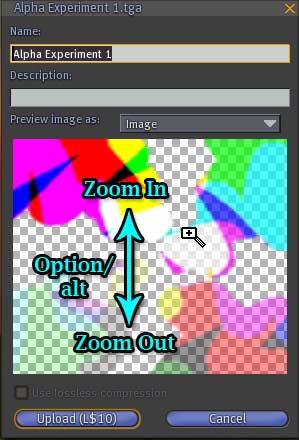
The Preview is kind of small; but you can Zoom in by holding down the Option/alt key, and dragging up. Dragging down zooms out.
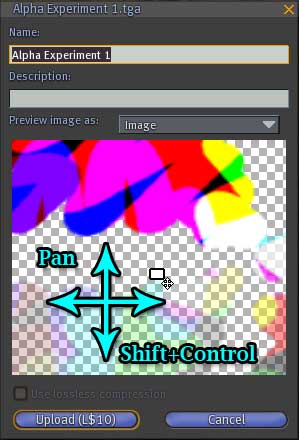
Holding Shift+Control and dragging in any direction allows you to pan around the image. So you can get a pretty good idea of how it looks before you ever upload.
Now, you probably don't want to keep this, so just tap Cancel, or Close the dialog, to make it go away. If you do want to keep it, you can. But the upload will cost you L$10.

Congratulations! You've successfully made an image with an Alpha Channel. Now that you understand what Alpha Channels are, that's not hard at all, is it?
From here, you can go back to any of the tutorials that explain how to make an Alpha Channel that shows what you want it to show (and hides what you want it to hide,) and I think you'll find that they suddenly all make sense! :D
To review very quickly; Channels drive - something -, with the value of each pixel in the Channel corresponding to an equal value of - something - .
What the - something - is depends on what the channel is, and how the program looking at the image interprets it.
The first three channels, Red, Green, and Blue, or RGB, drive the color of the image. The fourth channel, Alpha, or A, drives the Opacity in Second Life.
You won't see the effect of the Alpha channel when you look at your image in Photoshop, but it's there; and you will see it when you look at the Upload Preview in SL.
And that's what an Alpha Channel is, how it works, and what it does in SL.