Tutorials for Photoshop,
Paint Shop Pro, Blender, and More!
This is the second page of a 3 page tutorial. Click here to go to the first page.
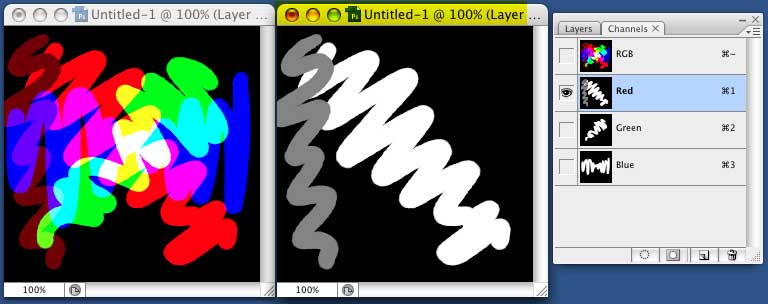
Click on the word "Green" in the Green Channel, and the image in the right hand window becomes pure black again. This is because all the pixels in this channel are still set to zero, from when we flooded the image with Black (Red:0, Green:0, Blue:0.)
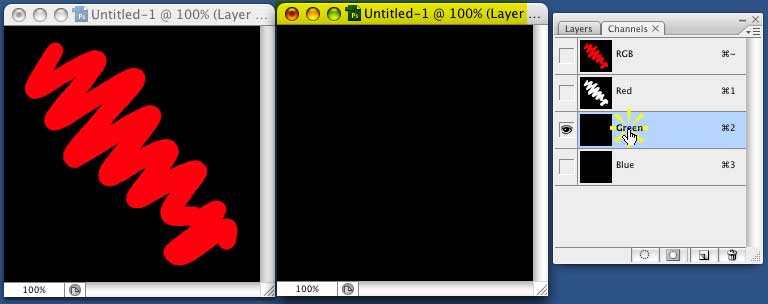
Draw another squiggle, any squiggle, in a different direction, so that it will cross the first squiggle at some point.
When you finish drawing, you'll see that this one is bright Green (Red:0, Green:255, Blue:0,) because you were using white, and therefore putting the maximum value into the Green channel.
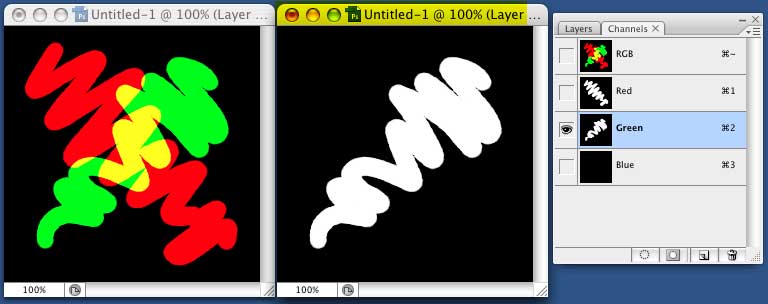
But, where the lines in the Green and Red channel cross, you'll see Yellow! That's because those pixels have 255 in both the Red and Green channels. Yellow is Red:255, Green:255, Blue:0. So that's what you get. (Run the mouse over the image, to see the numbers.)
You can probably guess what will happen when we draw a line in the Blue channel. But go ahead and try it anyway.
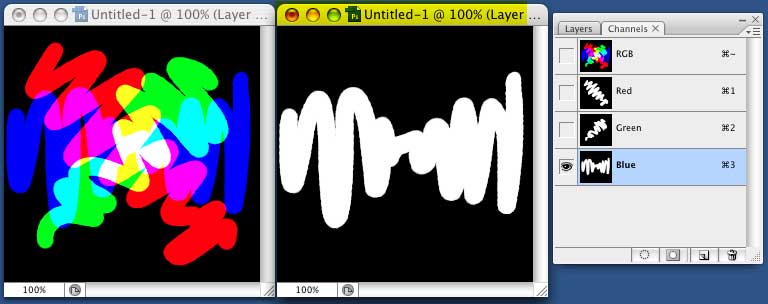
As you might expect, where it doesn't cross either of the others, you get Blue. Where it crosses the Green line, you get Cyan (R:0, G:255, B:255). Where it crosses the Red line, you get Magenta (R:255, G:0, B:255.)
And where it crosses the Yellow, you get White (R:255, G:255, B:255.)
Click the Color Swatch, and get a nice, 50% Gray. (If you're using the Adobe picker, click the B, for Brightness, and enter 50%. This lets you pick the Intensity of the - something - on the channel more directly. Hue can be anything, as long as the Saturation is 0%.)
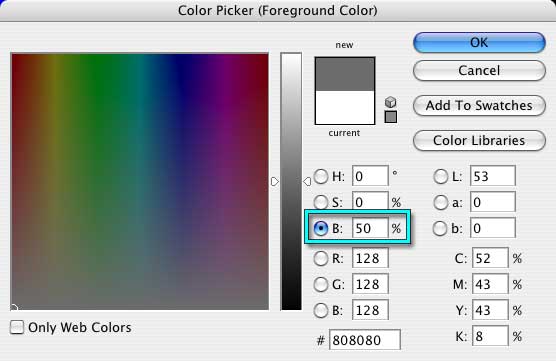
Scribble some more. Notice that, this time, you're getting darker shades of the pure colors. That's because you're only using half the intensity.
This time, instead of putting R:255 in the red channel, you're putting R:128. So each pixel that you have changed will have R:128, along with whatever values are in the Green and Blue channels. Run the mouse over the image, to see the numbers.
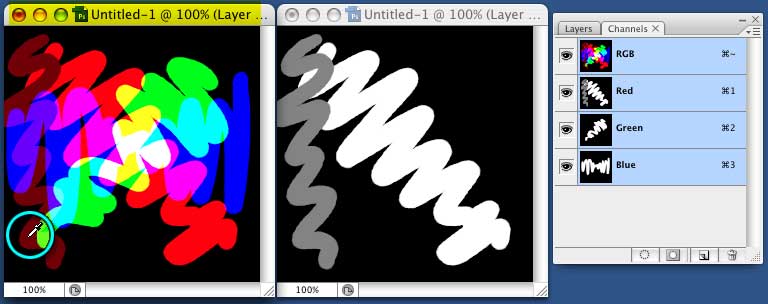
Click on the Window on the Left to enable it, and click on the RGB at the top of the Channels Palette so you'll be working in full color. (If you skip this step, you'll still be working in a single channel, and the next directions won't work. So don't skip it.)

Use the Eyedropper to pick up the color in one of the pure dark red areas, that doesn't cross any other colors.
Click on the Color Swatch, and it will open the Color Picker, so you can see what the RGB values are. You'll find that you have R:128, G:0, B;0.
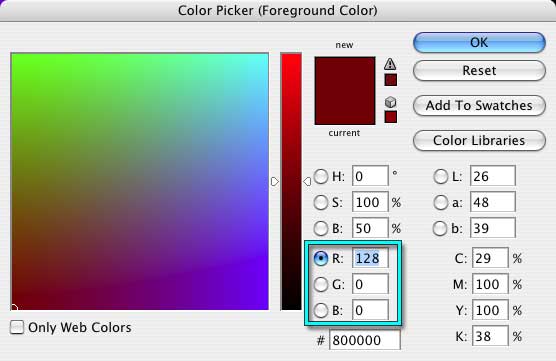
Use the eyedropper to check some other colors. Try experimenting with other shades of gray, and see what that gets you.
Play and experiment, until you are comfortable with the way that channels work, and how they are simply grayscale images of how much - something - you have.
Click here if you'd like some ideas about directions you can go with your experiments.
Otherwise, go in whatever direction you like, have a ball with it, and keep playing until you feel very comfortable with what Channels do, and you can predict what will happen when you do stuff to the channel.
When you're ready, click here to go on to the next section of this tutorial.