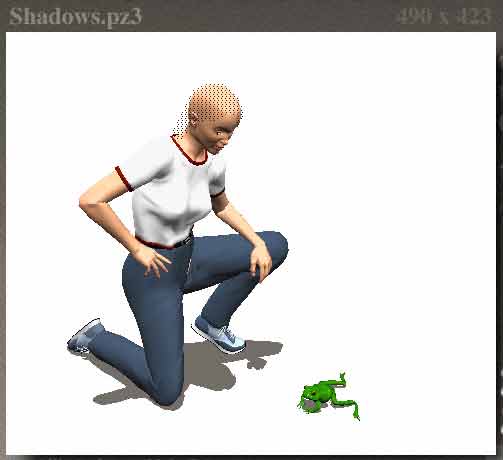
I think it's best to begin with your background picture; but you can begin with the posed figures, and find a background that goes with them. In any case, take care choosing the background. It will work better if it's clear and sharply focused, with distinct shadows; especially for your first few pieces.
Once you have chosen it, arrange and pose your figures in Poser, with the picture handy to refer to. I advise you not to import it yet, since having it in the background is distracting, and will only make the posing more difficult.
|
When the figures are arranged to your liking, change the background color to white using either the buttons at the right of the window, or the Display- Background Color... menus. If you are using the buttons, holding down the option/alt key will allow you to pick the color from the color picker used by your computer, instead of the inaccurate one found in Poser.You may find the white hard to work on, but it's necessary for some steps further down the line.In the materials dialog (under the Render menu), change the color of the ground plane to white as well, making sure it has no texture or bump map. (Choose "No Texture" if there is one there already.) |
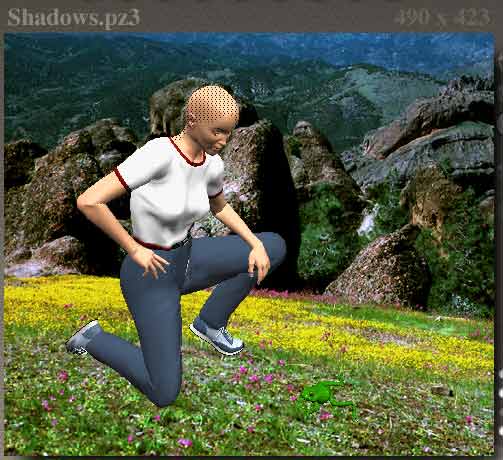 |
Now import your picture into Poser using the File- Import- Background Picture... menu.
If the proportions of your window do not match those of the picture you are importing, Poser will ask you if it should change the proportions of the window. Say yes. It's important. Save your work. Now the fun begins! <g> |
 |
The first thing that you need to do is align the ground plane in Poser to the one in your picture.
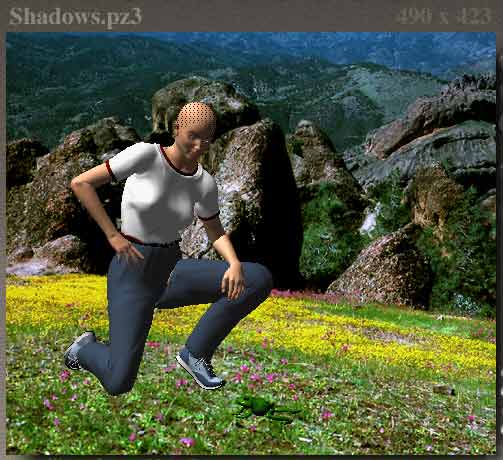
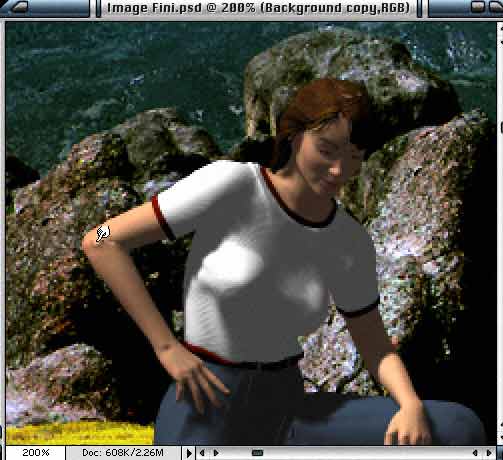
Choose the Main Camera, and using the various parameter dials, adjust it until ground planes match. It's easiest to do this by switching back and forth from wireframe or outline to one of the more fully shaded previews. Pay special attention to the scaling of your figure, and the focal length of the camera used to take the picture. If the top and bottom lines of boxes or buildings have an acute slope towards each other, use smaller numbers on the dial. If the slope is more gradual, use larger numbers. This is the hardest part, and may take a while. If there is a horizon line in your picture, line it up with the one in Poser. Use all the guides you can! <g> If this is not done correctly, the picture will not look right no matter how carefully the rest is done. Once you get it, SAVE! |
 |
Now you are ready to adjust your lighting.
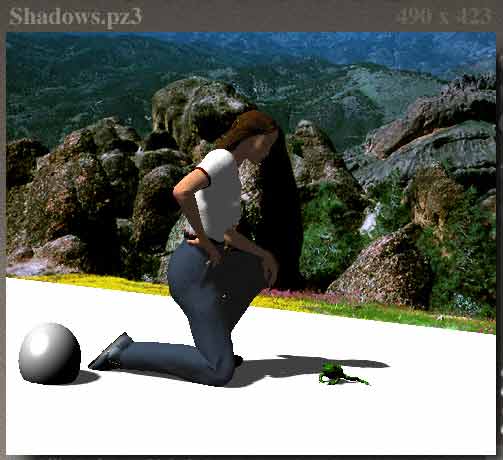
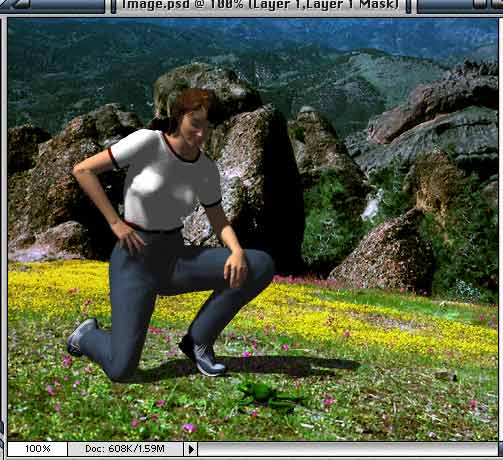
Outdoors, there is often only one light. Turn off the other default lights by holding down the option/alt key and clicking on them, or by choosing Object- Properties in the menu bar, and unchecking the On box. If you are doing an interior, you may need to add lights. Now move the light (or lights) with the Parameter dials, or using the Light Controls, until the shadows match the ones in the photograph. Do a test render to see if you were right. If you were, great! If not, adjust the light again. It sometimes helps to put an object similar to an object in the photo in your picture to test the light with, as shown here. If there are other people in the picture, match your shadows with theirs. It can be helpful to export your renders, open them in photoshop, and drag the image onto your photo, reducing the opacity to 50% and testing the shadows against the real ones. In any case, this step is also crucial. When you get it, SAVE! Once you have these two steps right, the rest is ridiculously easy! |
 |
At this point, you may find that you would like a different composition better. Perhaps there is a tree growing from someone's head, or an unfortunate shadow on a face.
DO NOT MOVE THE CAMERA! If you do, you will have to do all the work from the last two steps over again. Instead, give all the figures in your composition child relationships to one who will act as parent (the Poser manual explains how to do this) and move the parent using the parameter dials to swivel it, or move it in or out. Be careful about the moving in or out, however. Remember the scaling of the figure has to match that of the photo. If you lose it, scale the figure. DON'T TOUCH THE CAMERA! |
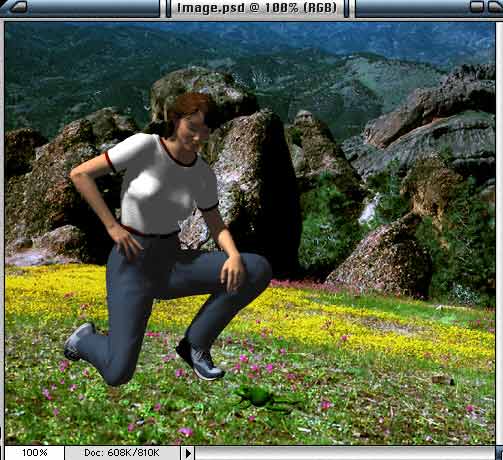 |
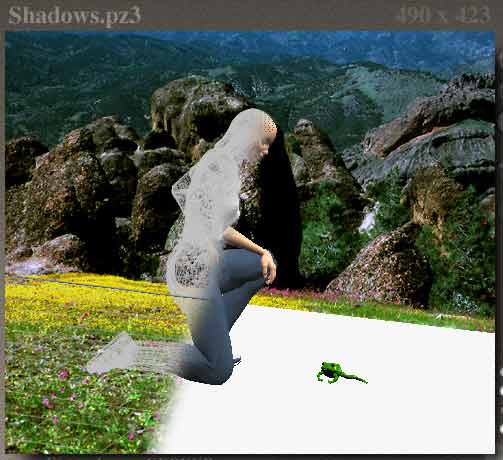
Go to Render in the menu bar, choose Render Options, and check the radio button next to Render Over Background Picture.
Make sure the ground plane has been turned off. (Display- Guides- Ground Plane or command/control G.) Render it! <g> Under the File menu, choose Export - Image. When the dialog window appears, choose Save File As... Photoshop. Put it wherever you like and give it a name. I'll call this one Image. It should look pretty good, but with no shadows. You are about to fix that. |
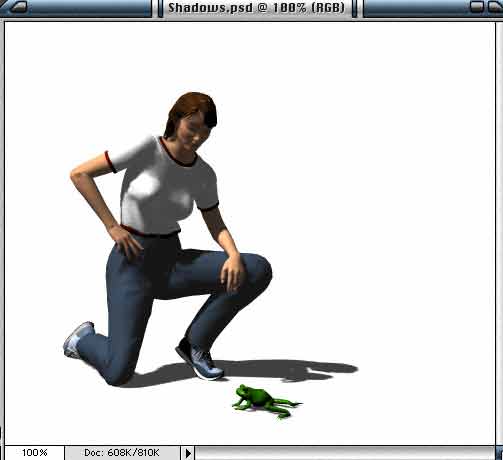 |
When the Poser window comes back, turn the ground plane on (command/control G.) Make sure that it's white, with no texture or bump map applied.
Now go to the Render- Render Options and choose Render Over Background Color. Your background color is white, isn't it? If not, make it so. <g> Render again, export the image, and give it a name like "Image Shadows." |
 |
Now for the best part.
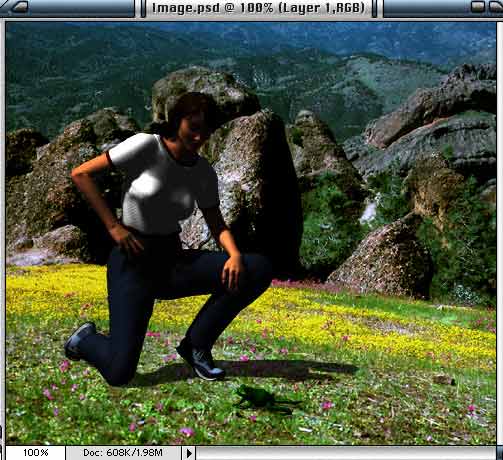
Open both images in Photoshop, and arrange their windows so that you can see them both. Choose the Move Tool (v), hold down the shift key, and drag "Shadows" onto "Image." This will create a new layer in "Image," and since the two are exactly the same size, the shift key will make sure that they are aligned perfectly. Choose Multiply Mode in the layers palette. And presto! you have shadows! You also have a really, really dark figure. But not for long. |
 |
Go to the Select menu, and choose Load Selection.
In the dialog box that appears, choose channel- Alpha 1. This loads the alpha channel that Poser automatically makes whenever it renders a picture. When the marching ants show up, go back to the Layers Palette, and click on the New Mask button (the little circle in a square on the left of the bar at the bottom of the palette.) And just like that, you figure is there with perfect shadows! |
 |
In fact, unless your figure is on a smooth floor, they are probably too perfect.
You can fix that by taking the smudge tool and pulling the shadow out over the photo a bit. Make sure you are working on the shadow layer (Layer 1) and pull the top of the shadow into the transparent area at the top, and the transparent area into the shadow at the bottom. Don't worry about being careful of the figure; that area is masked. Match the ground by pulling shadow up onto raised areas (or off of them at the bottom of the shadow.) Leave smooth areas alone. |
 |
Once the shadow is all ruffled and mussed up, like it should be, and follows the contour of the ground (or whatever) you are ready for the next step.
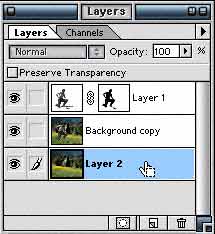
Open the original background photo, and make sure it's exactly the same size as the image you are working with now. (Check Image- Image Size in both, and fix it if it isn't.) Now hold down the shift key, and drag a copy onto Image, just like you did before. In the layers palette, drag the Background layer onto the New Layer button (the little page in the middle on the bottom) to make a new layer called Background Copy. Delete the original background layer by dragging it onto the little trash can at the bottom right. Now drag the layer with the photo, which is Layer 2, underneath the Background Copy layer. |
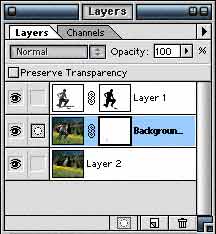 |
Click in the Background Copy layer, to make sure you are working there.
Now click the mask button (the little circle in a square on the bottom left in the Layers palette) to make a mask for this layer. Make sure you are working in the mask by clicking on it. The icon to the left of the layer will show the little circle in a square. If it shows a paintbrush, click on the white square to the right of the thumbnail. |
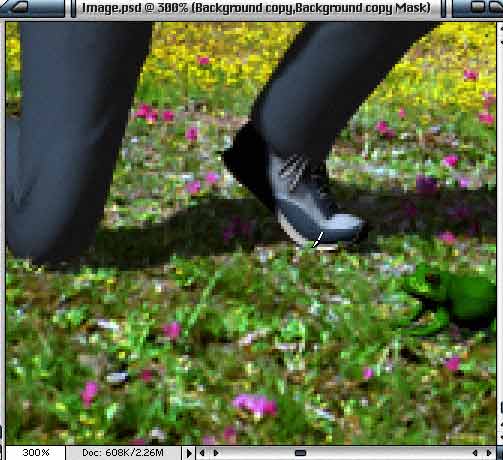 |
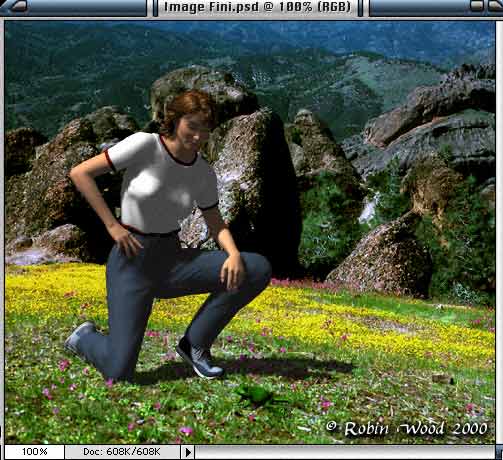
Using black paint and the paintbrush of your choice, paint a mask up over the edges of the figure to blend them into the photo.
If you overdo it, go back with white and fix it. In this case, she needs grass showing in front of her shoes. Your figure may need something else in front, like the bedpost later in the second section of this tutorial. It's best if there is something, because it adds to the illusion that the figure is actually in the photo, and not just pasted on. But if there isn't anything, you can skip this whole part, and just leave your picture with two layers. |
 |
Finally, if necessary, it's time to fix the artifacts that Poser often leaves. You know, the bits where the joints don't quite work right, and the hair, and things like that.
I find that it works best to fix them with the smudge tool as well as the paintbrush, and I often fix them on a new layer in case I change my mind about something. But that's just an old habit of mine. You don't have to do that! <g> |
 |
Once the figure is completely retouched, and you are sure you won't want to change anything else, you are ready for the final step.
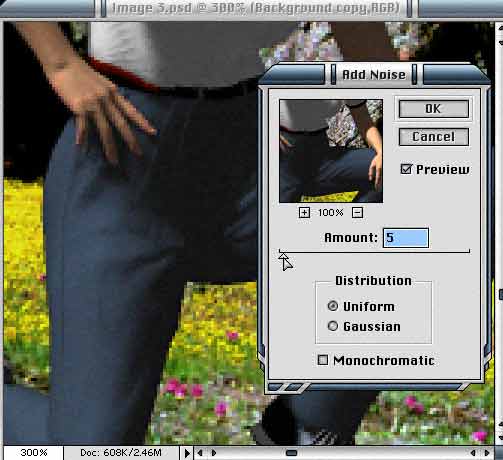
If you did your retouching on a different layer, click the arrow key at the top of the Layer Menu, and Merge Down until all you have left are the three layers you started with. Then, if your background picture was a photograph, go to the Filter menu, and choose Noise- Add Noise. When the dialog box opens, check the radio button for Uniform, and adjust the slider until your figures no longer look smoother than the picture you started with. This step is necessary because all photographs made with film contain some noise. (It's because of the way they are made) and you want your addition to match the original as closely as possible. |
 |
And that's it!
Sign your work, you're done. <g> If you want a few more hints about working with interiors, click here. |
If you have a question, write to me and ask it!
Everything on this site is copyright © Robin Wood; all rights reserved. Please do not use anything without permission. To get permission, write to Robin, and explain what you intend to use it for.